Pepperoni Pizza Sliders {VIDEO}
This post may contain Amazon or other affiliate links. As an Amazon associate, I earn from qualifying purchases.
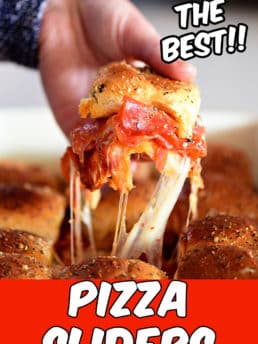

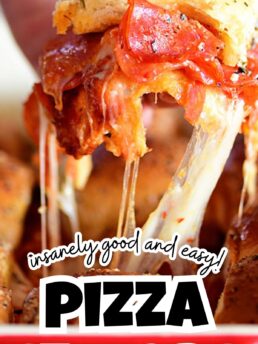
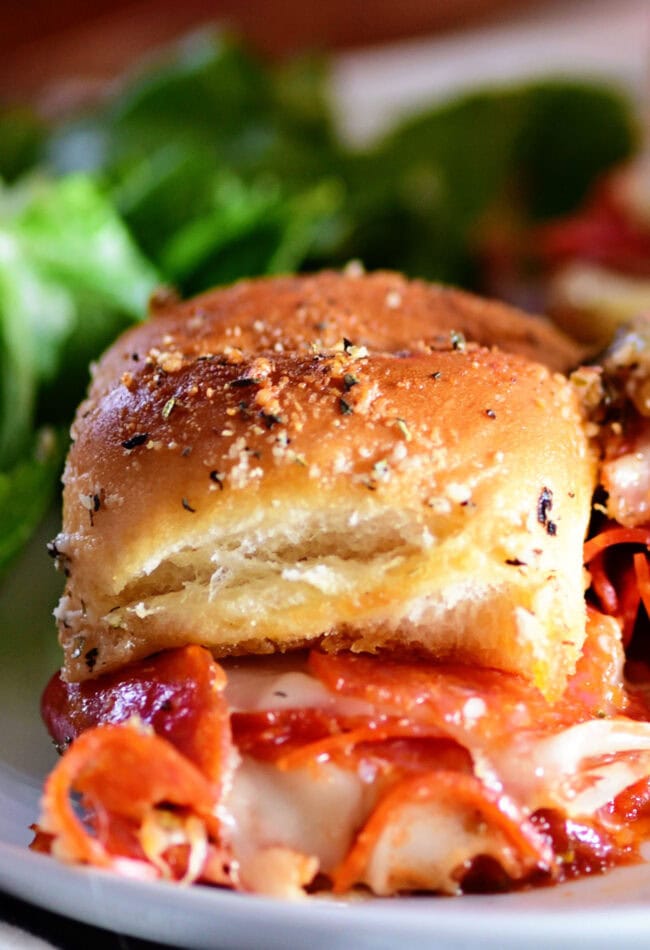
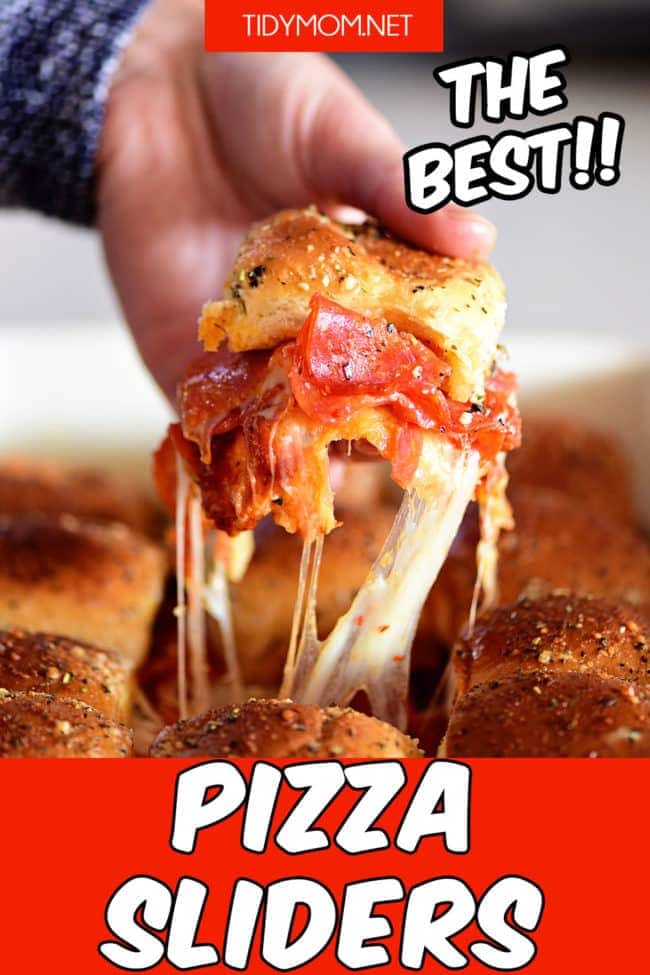
PIZZA SLIDERS are always the hit of the party! Pull-apart dinner rolls are layered with sauce, mozzarella, and pepperoni topped with a buttery garlic Parmesan crust. It’s hard to go wrong with this one and you can use your favorite pizza toppings if you like!
Looking for other family-friendly pizza recipes? You’ll also love Chicken Bacon Ranch Pizza, Black Bean & Chicken Taco Pizza, BBQ Chicken Pizza Soup, or Homemade Pizza Rolls.
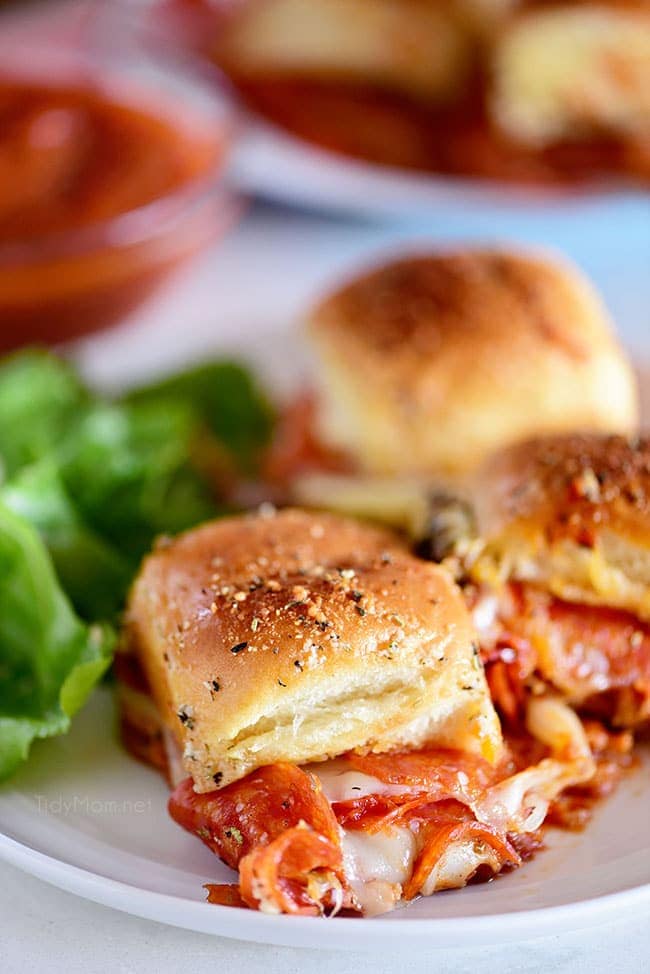
Table of Contents
Favorite Pepperoni Pizza Sliders
These Pepperoni Pizza Sliders are always a crowd favorite at our house—especially on game day! They’ve got all the classic pizza flavors we love, packed into warm, cheesy pull-apart rolls.
Why We Love Pizza Sliders
- Mini pizza perfection: All the classic pizza flavors packed into a fun, bite-sized slider.
- Quick and easy: Perfect for busy weeknights or last-minute get-togethers.
- Kid-friendly: A hit with the little ones, and so easy to customize!
- Melty cheese & crispy edges: Who doesn’t love that perfect cheesy, crispy bite?
- Great for a crowd: These sliders are super easy to make in large batches for parties or game day.

What You Need To Make Pizza Sliders
This pizza slider recipe seriously comes together in a flash—especially since you probably already have most of the ingredients on hand. Just grab this simple list, and you’re all set!
- Hawaiian dinner rolls
- Pizza or marinara sauce
- Mozzarella cheese
- Sliced pepperoni
- Butter
- Grated parmesan
- Italian seasoning
- Garlic powder
- Onion powder
- Crushed red pepper
For specific amounts, please refer to the printable recipe card at the bottom of the post.

How To Make The Best Pepperoni Pizza Sliders
Follow these easy steps and you’ll be in gooey, cheesy pizza heaven.
When you are making this recipe, you’ll want to use the full recipe at the bottom of the page.
- Preheat oven and spray baking dish.
- Slice rolls in half and place the bottom half in the dish.
- Spread marinara, then layer with cheese and pepperoni. Top with the other half of the rolls
- Mix butter, Parmesan, and seasonings. Brush on sliders.
- Cover with foil and bake until cheese melts. Uncover and bake a few more minutes.
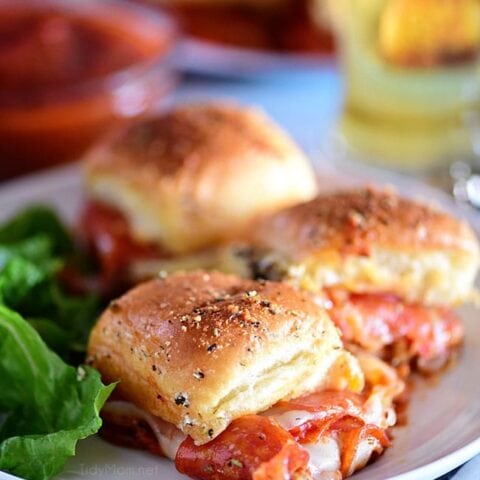
- Slice, serve warm, and enjoy!

Can I Customize These Pepperoni Pizza Sliders?
Yes! You can switch up the toppings, cheese, or buns for this recipe to fit your personal preferences. The pepperoni pizza sliders are my personal favorite topping combo, but here are a few other options as well.
- Protein: cooked bacon, sausage, Canadian bacon, chicken
- Cheese: provolone, provel, cheddar, pepper jack, colby
- Bread: dinner rolls, brioche rolls, mini hoagies
- Veggies: Peppers, broccoli, mushrooms, onions

Best Ways To Serve Pepperoni Pizza Sliders
Whether you’re serving them as a meal or an appetizer, here are some perfect sides to pair with your Pizza Sliders!
As a meal:
As an appetizer:
Just like pizza, these bad boys are amazing leftover, served warm or cold!
Fun Ideas For Serving These Sliders At A Party:
- Slider Bar: Set up a “build-your-own” slider station with toppings like extra cheese, olives, peppers, and different sauces. Let guests customize their own mini pizzas!
- Skewered Sliders: Use toothpicks or mini skewers to serve each slider—perfect for easy grabbing and extra fun!
- Slider Platter: Arrange the sliders in a circular pattern, like a pizza, and serve with marinara dipping sauce in the middle.
- Mini Slider Baskets: Serve the sliders in small, lined baskets for a casual, diner-style vibe.
- Slider Flight: Offer a few different slider varieties (like pepperoni, veggie, or BBQ chicken) and let guests sample a few different flavors.
Customize Pizza Sliders
You can switch up the toppings, cheese, or buns for this recipe to fit your preferences. The pepperoni pizza sliders are my personal favorite topping combo, but here are a few other options as well.
- Protein: cooked bacon, sausage, Canadian bacon, chicken
- Cheese: provolone, provel, cheddar, pepper jack, colby
- Bread: dinner rolls, brioche rolls, mini hoagies
- Veggies: Peppers, broccoli, mushrooms, onions
Store And Reheat Sliders
Storing:
To keep leftovers fresh, store the sliders in an airtight container in the fridge for up to 3 days. If they’re not already assembled, store the buns, cheese, and toppings separately to avoid sogginess.
Reheating:
To reheat, place the sliders on a baking sheet and cover with foil. Heat in a preheated oven at 350°F for about 10-12 minutes, or until warmed through. For a crispier top, remove the foil during the last few minutes of heating.
This way, you’ll enjoy that cheesy, melty goodness all over again!
Tools Used To Make These Pepperoni Pizza Sliders
This silicone basting brush is my go-to over a traditional basting bush because the silicone bristles are so much easier to clean, and it spreads sauce and any other liquids with ease!
A good quality bread knife is a must-have in the kitchen! I’ve had this knife for years and it still works beautifully, saving me from a sore arm any time I need to cut through a dense loaf of bread.
I love the functionality and the cute color of this baker. It’s perfect for impressing friends and family with a dish that not only tastes amazing but looks amazing too.
Pizza Sliders are the kind of recipe that brings people together—whether it’s game day, a weeknight dinner, or just a reason to gather and snack. Make a batch, share the love, and don’t expect leftovers!
Pepperoni Pizza Sliders
Pizza night reimagined! These Pizza Sliders have layers of sauce, mozzarella, and pepperoni on pull-apart rolls with a buttery garlic Parmesan crust. Perfect for parties, dinner, or snacking!
Ingredients
- 12 Hawaiian dinner rolls (don't separate the rolls)
- 3/4 cup pizza or marinara sauce
- 12 slices of mozzarella cheese
- 6 ounce package of sliced pepperoni
- 1/2 cup butter, melted
- 3 tablespoon grated parmesan
- 1½ tablespoon Italian seasoning
- 1 teaspoon garlic powder
- 1 teaspoon onion powder
- 1/4 teaspoon crushed red pepper
Instructions
- Preheat oven to 350° F. Lightly spray an 11 x 8-inch pan with cooking spray
- Using a bread knife cut sheet of rolls through the middle to make them into buns (separating tops from bottoms), being careful to try to keep rolls connected. Place the bottom half of the rolls in a baking dish.
- Spread the marinara sauce on the bottom layer of buns, layer on 6 slices of the cheese and half the pepperoni. Layer remaining cheese and pepperoni then replace top half of the rolls to close sandwiches.
- In a small bowl combine butter, Parmesan cheese, Italian seasoning, garlic powder, onion powder, and crushed red pepper. Brush evenly over sliders.
- Cover dish with aluminum foil and bake for 15 minutes or until cheese is melted. Take foil off and cook an additional two minutes. Remove from the oven. Slice them apart and serve warm.
Notes
STORAGE
Storing: Store leftover sliders in an airtight container in the fridge for up to 3 days.
Reheating: Reheat in the oven at 350°F for 10-12 minutes, covered with foil, for best results.
Nutrition Information:
Yield: 12 Serving Size: 1Amount Per Serving: Calories: 352Total Fat: 24gSaturated Fat: 12gTrans Fat: 1gUnsaturated Fat: 10gCholesterol: 60mgSodium: 767mgCarbohydrates: 20gFiber: 2gSugar: 2gProtein: 14g
Nutrition information is estimated based on the ingredients and cooking instructions as described in each recipe and is intended to be used for informational purposes only. Please note that nutrition details may vary based on methods of preparation, origin, and freshness of ingredients used.
Originally posted in August 2020. Updates have been made with more information but no changes to the recipes.

Hi there, I'm Cheryl!
As a wife, mom, and caffeine enthusiast, my journey has taken me from bustling mornings with my family to sharing delicious recipes, home care tips, and heartfelt decorating insights with wonderful readers like you. My love for baking, photography, and tidiness shines through every post I craft. Dive into my world and discover the art of homemaking, one tidy moment at a time. Read more...
Tidymom is a participant in the amazon services llc associates program, an affiliate advertising program designed to provide a means for sites to earn advertising fees by advertising and linking to Amazon.com.
Please respect my work, recipes and photographs. If you do use a recipe in your own writing, please give proper credit and link back to the original post.
We tried them tonight and they were fantastic! Thanks for this recipe!
Can I make these ahead the night before?
they are best made fresh. I’m afraid the sauce would make the rolls soggy if you made them too far ahead of time. You can make and bake them ahead, but you would still want to put them in the oven to heat them up.
These were soo good! I broiled the bottom layer of buns so they won’t get soggy from the sauce, and I used potato rolls so there won’t be any sweetness and my boys loved it! Thank you for sharing this quick and easy recipe with us!!! ???
great idea about broiling the bottom layer of buns!! glad your family enjoyed them as much as we do!
I made these last night for my family and they were so delicious. The grocery store was out of sweet rolls but we used dinner rolls and it was just as delicious. I will broil the bottom layer of buns next time to prevent soggy buns. But loved the recipe and loved it didn’t heat up my kitchen in the summer! Thank you for sharing!
I love the idea of broiling the bottom buns!! Thanks for sharing!!
I just made these for my grandkids lunch. Oh my gosh they absolutely loved them. I will have to make two batches next time. Thank you so much for the recipe.
We loved this pizza version of sliders. Thanks for the recipe!