Red Velvet Cake & Cinnamon Buttercream Frosting Recipe
This post may contain Amazon or other affiliate links. As an Amazon associate, I earn from qualifying purchases.
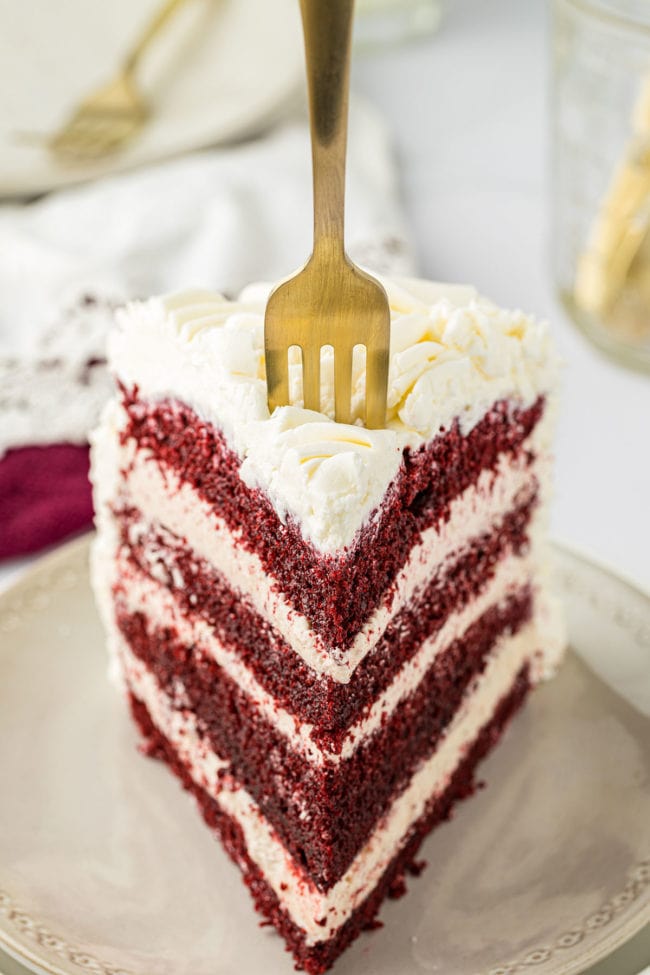
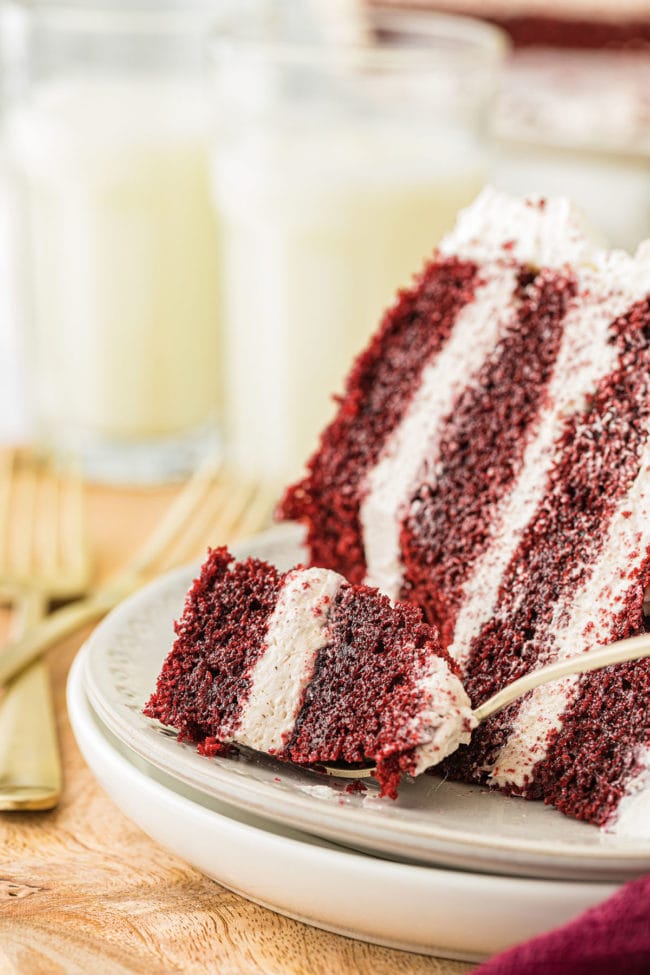
RED VELVET CAKE WITH CINNAMON BUTTERCREAM. This rose cake is sure to make any birthday or special occasion spectacular. The red velvet cake made from scratch is soft, moist, and tender, with the perfect red velvet flavor. Inside you will find fluffy cinnamon buttercream between the layers and topped with a delicious cream cheese frosting. A cake they will never forget!
Whether for a birthday cake, Valentine’s Day, Christmas, or a weekend dessert you can’t go wrong with red velvet recipes like Red Velvet Gooey Butter Cookies, Red Velvet Pancakes, and Red Velvet Hot Chocolate.
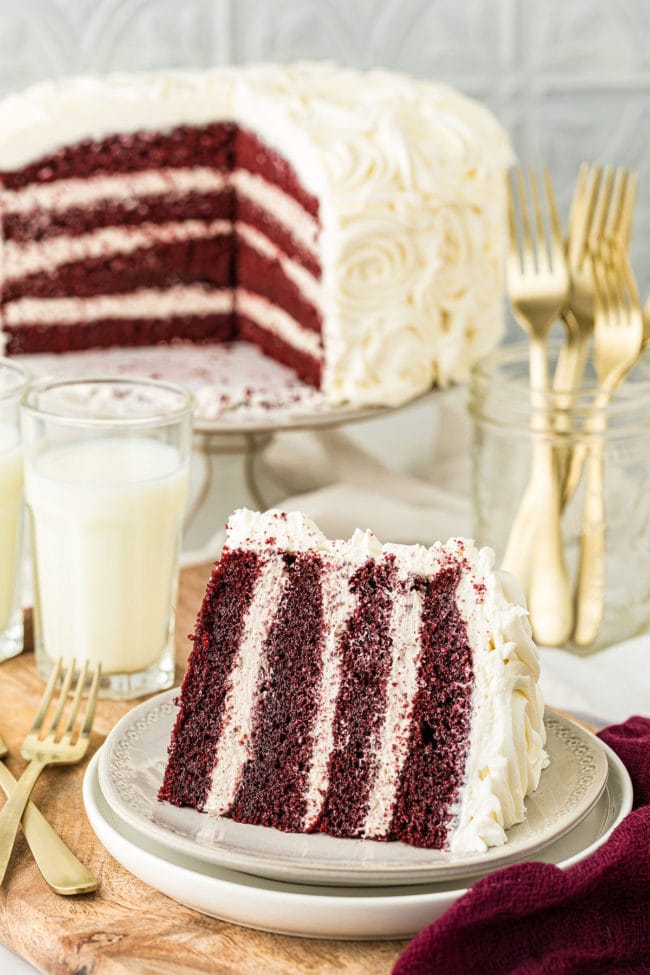
Table of Contents
Why I Love This Red Velvet Rose Cake Recipe
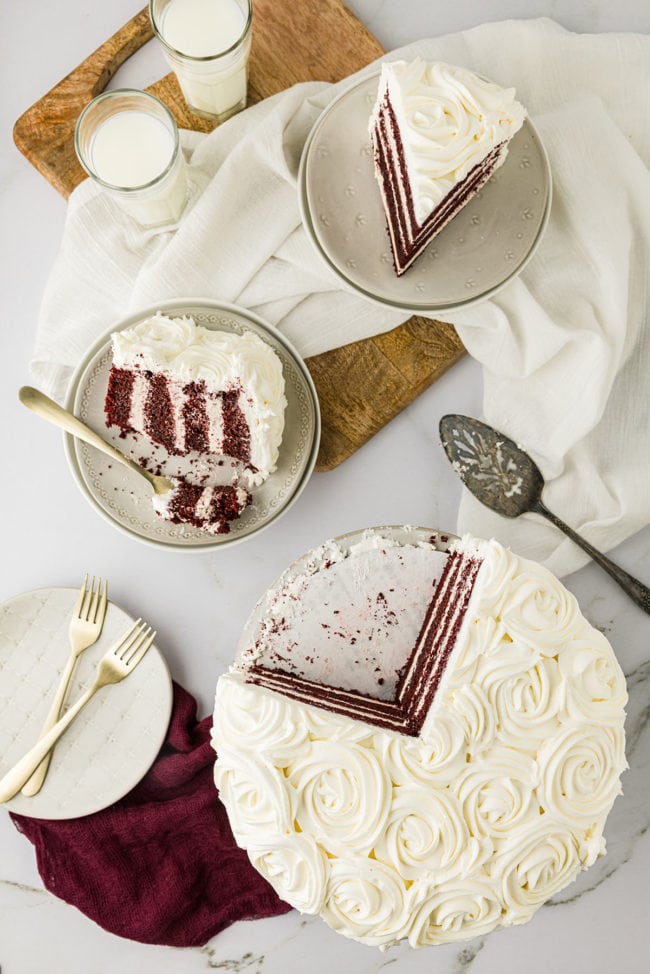
As you can see, a rose cake looks intricate, beautiful, and visually stunning. It’s SO easy you won’t believe it until you try it for yourself! I really love making this red velvet rose cake, not just for the wow factor, but because it tastes spectacular too!
- I love the unexpected addition of a fluffy cinnamon buttercream nestled between the red velvet layers. (It’s even more of a wow factor than the piped rose frosting.)
- You’ll love the delicious chocolate undertones, the tang of buttermilk, and that heavenly melt-in-your-mouth crumb.
- We all love a brilliantly hued red velvet cake made from scratch; soft, moist and tender.
- Everyone will love that piping rosettes on the cake is easier than icing a smooth birthday cake–EVERY day of the week!
- Anyone will love receiving this gorgeous red velvet rose cake, special occasion or not!
This post may contain affiliate links. Please read my disclosure policy here.
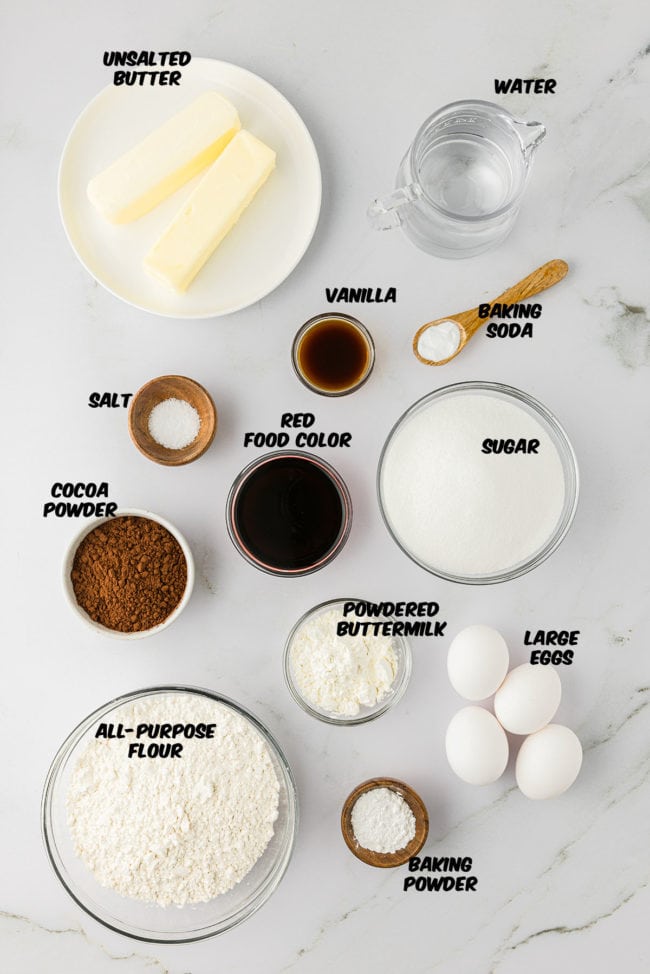
Homemade Red Velvet Cake Ingredients
First, grab the equipment you’re going to need for this red velvet cake: grab two 9” x 2” cake pans, non-stick spray, mixing bowls, measuring implements, a sifter, wooden spoon, stand mixer with a paddle attachment, large spatula, and a cooling rack. Highly recommended but optional: kitchen scale and kitchen timer.
For specific amounts, please refer to the printable recipe card at the bottom of the post.
- All-Purpose Unbleached Flour – Use a kitchen scale for the most successful red velvet cake texture; otherwise, fluff, spoon, and level the flour.
- Natural Cocoa Powder – I usually use Hershey’s unsweetened cocoa powder.
- Baking Powder & Baking Soda – make sure they are fresh and have not expired.
- Powdered Buttermilk
- Water
- Salt
- Vanilla Extract
- Red Food Coloring – You can use liquid food coloring or a super red gel . Gel color is concentrated, so you need less than you would with liquid food coloring- either will work. (use 1-2 teaspoons if using gel)
- Unsalted Butter – you don’t have to wait until it is room temperature.
- Sugar – white granulated
- Large Eggs – should be at room temperature.


How To Make A Red Velvet Cake From Scratch
Now, now, bear with me. The instructions may seem longer than some for a red velvet cake recipe, but keep this in mind, it’s a homemade cake from scratch with two types of frosting! All the steps are simple, and there is more detail in the recipe card! So don’t miss out on making this delectable red velvet cake. You can bake the cake one day; frost and pipe the super easy rosettes the next!
When you are baking, you’ll want to use the full recipe at the bottom of the page.
- Sift the dry cake ingredients, stir, and set aside.
- Mix the wet ingredients in a separate bowl and set aside.
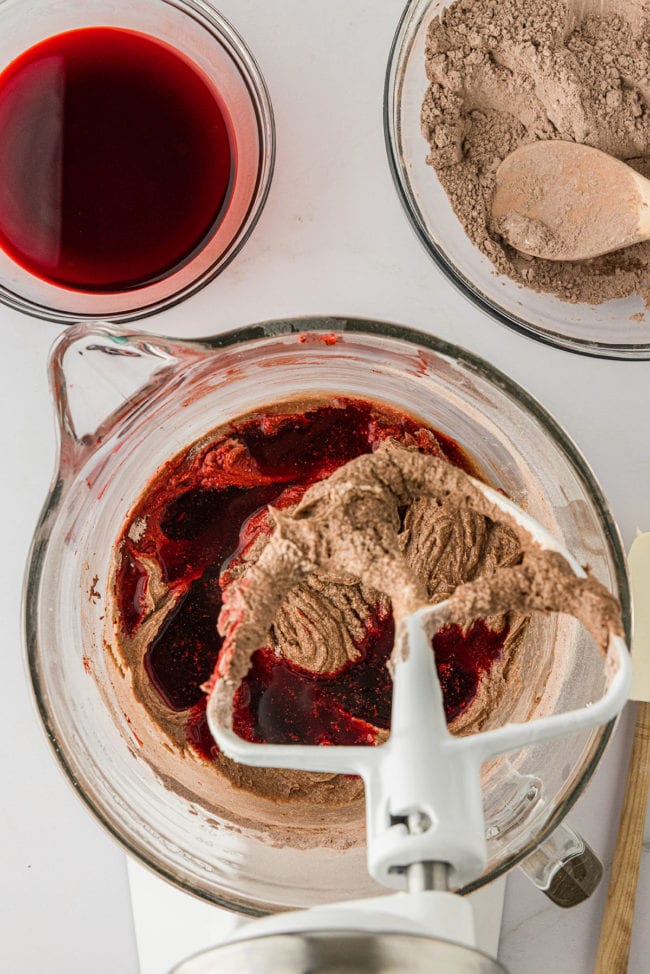
- Beat the butter in a stand mixer, then slowly add sugar until light and fluffy.
- Add the eggs one at a time.
- Start combining the dry flour mixture, with the wet ingredients.
- Divide the cake batter equally into the prepared pans.
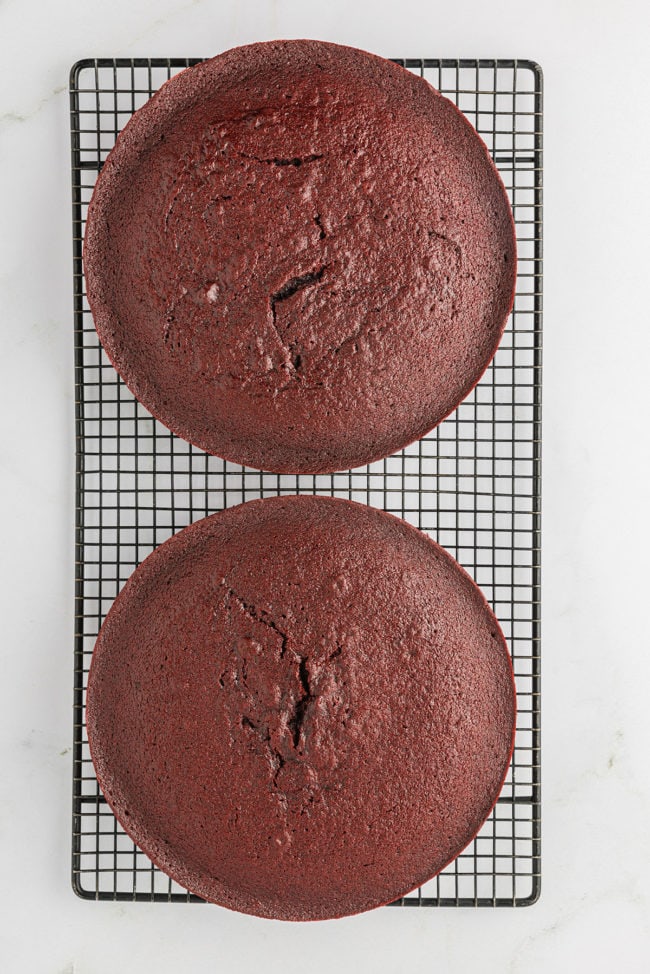
- Bake the red velvet layers in preheated oven.
- Allow the cakes to cool completely.
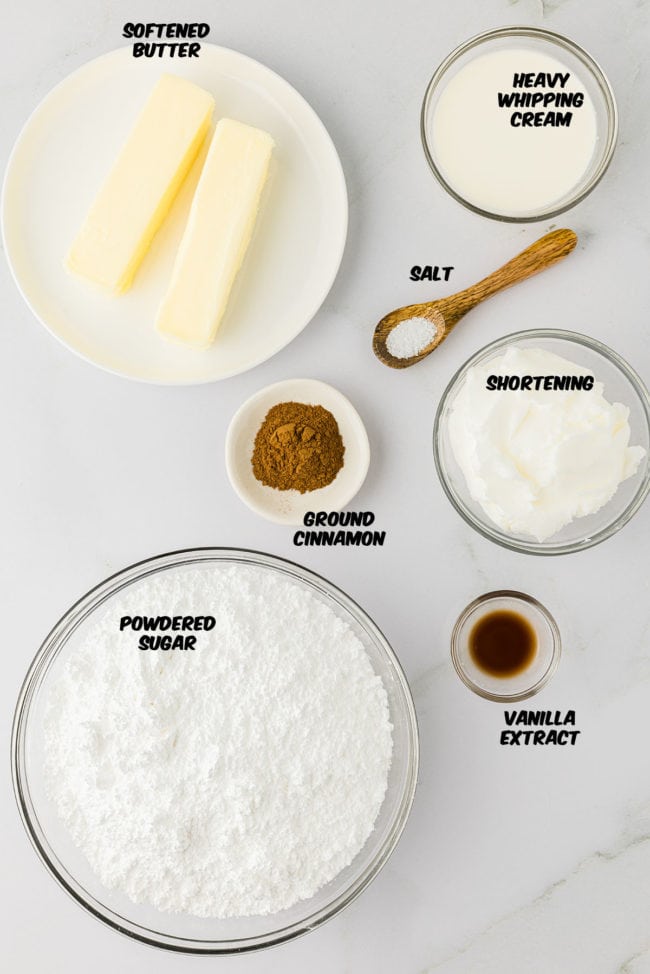
Ingredients For Your Red Velvet Cinnamon Buttercream Layers
- Butter – unsalted and softened
- Vegetable Shortening
- Salt – a pinch
- Vanilla Extract
- Powdered Sugar – break up or sift if you have clumps.
- Ground Cinnamon – should be fresh.
- Heavy Whipping Cream (aka Heavy Cream) – with a minimum 36% butterfat content. If it doesn’t say “heavy,” the product labeled whipping cream can contain 30% to 35% milk fat that will alter the texture of your cinnamon buttercream.
How To Make Cinnamon Buttercream Cake Filling
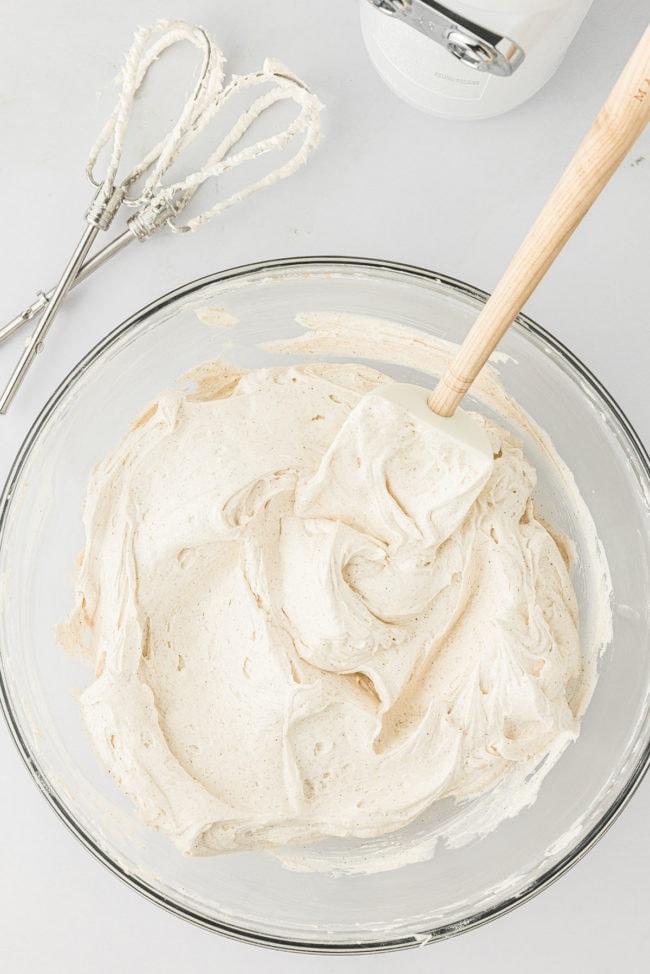
- Blend butter and shortening salt, vanilla, and cinnamon until smooth.
- Mix powdered sugar 1 cup at a time, and beat until thick and gooey.
- Pour heavy whipping cream using the highest speed.
- Beat until the cinnamon buttercream frosting is fluffy.
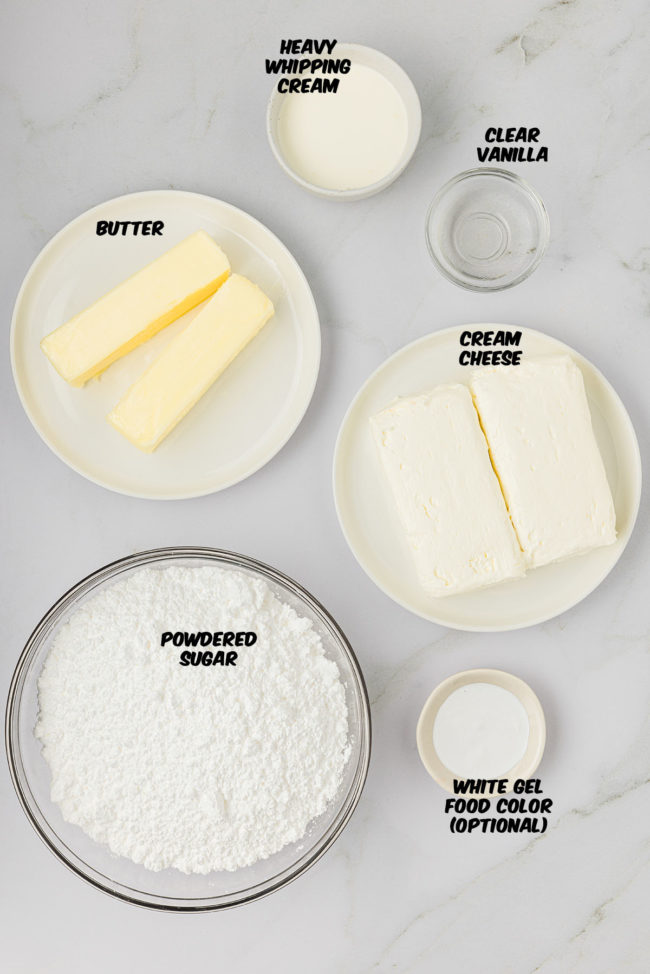
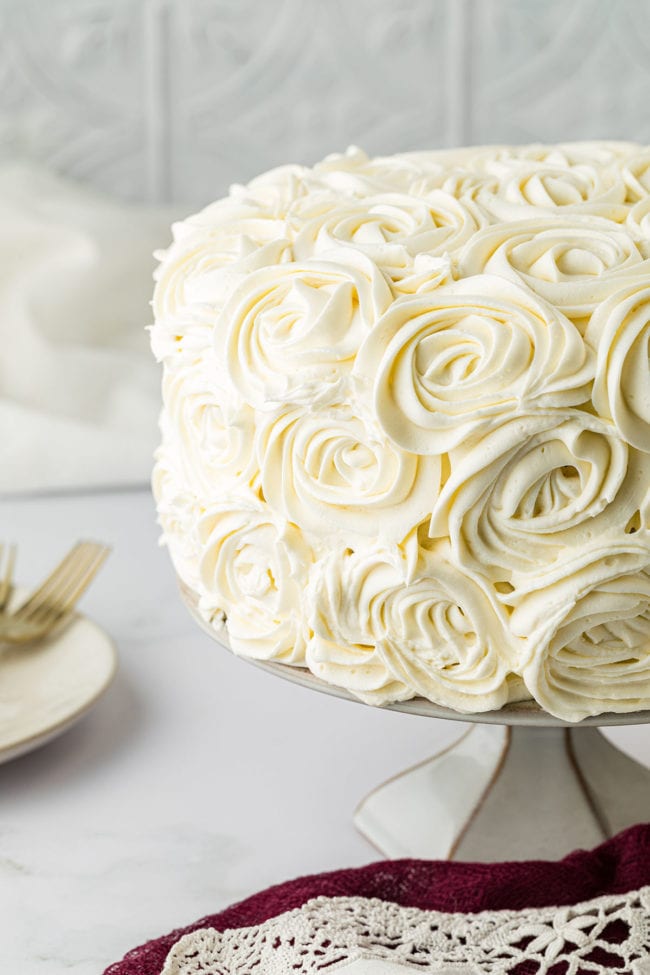
Ingredients For Gorgeous Piped Vanilla Cream Cheese Rose Frosting
Stunning piped roses contrast so beautifully with the deep dark red cake. The tangy-sweet chocolate is balanced by the savory-sweet tartness of cream cheese frosting.
- Butter – (salted or unsalted?) softened to room temperature.
- Cream Cheese – at room temperature; full fat.
- Clear Vanilla Extract – clear vanilla keeps vanilla cream cheese frosting a crisp white.
- Powdered Sugar – break up or sift if there are any clumps.
- Heavy Whipping Cream – same as the cake, stick with the “heavy.”
- White Gel Food Coloring – is optional but will increase the brilliance of the piped rose decorations.
Making Vanilla Cream Cheese Frosting For Piped Roses
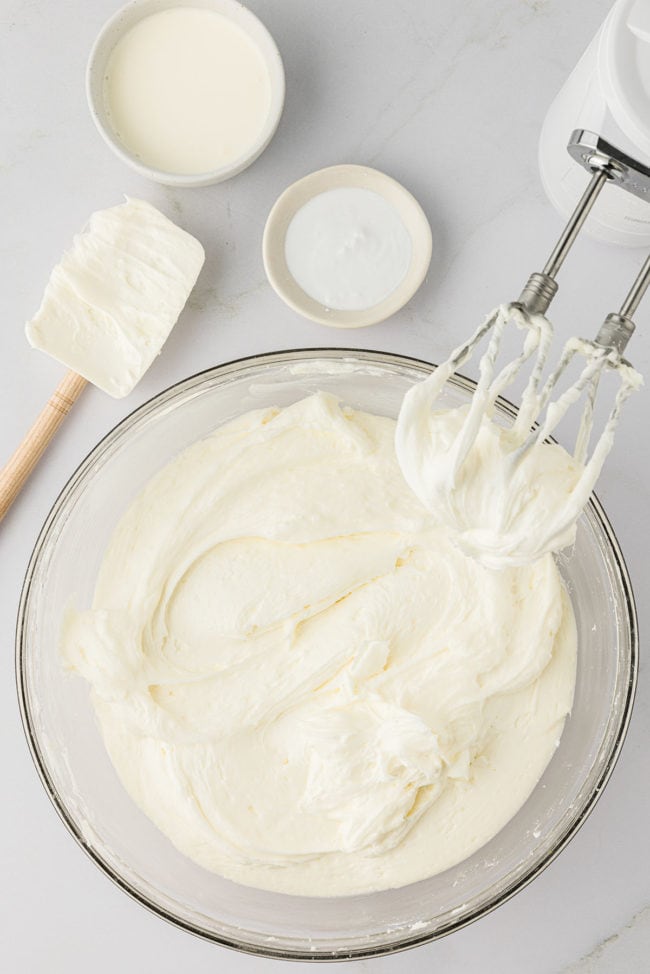
- Blend butter slightly, then add cream cheese and blend until combined.
- Combine vanilla and sugar on low; beat on medium until it begins to get fluffy.
- Beat heavy cream into frosting slowly until it is thick enough to hold its shape to pipe roses.
- Add bright white gel coloring to make cream cheese frosting bright white.
Assembling Red Velvet Cake With Rose Decorations: Rose Cake
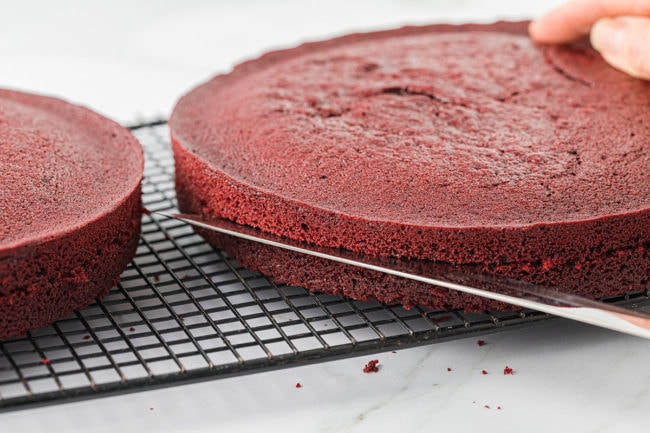
- Use a long serrated knife (or nifty cake slicer/leveler) to slice cooled cake layers in half horizontally for four cake layers.
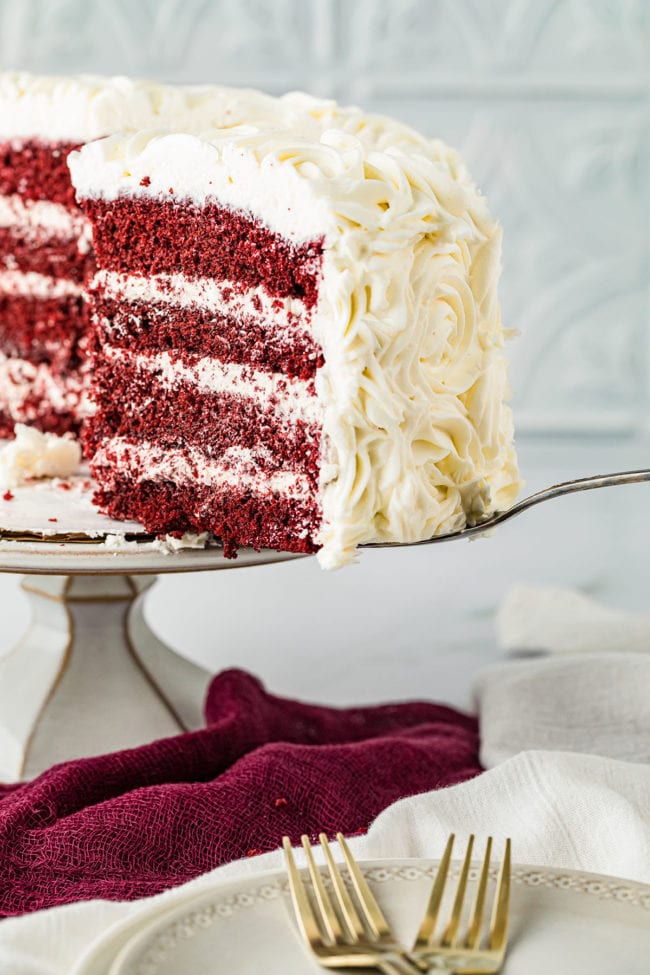
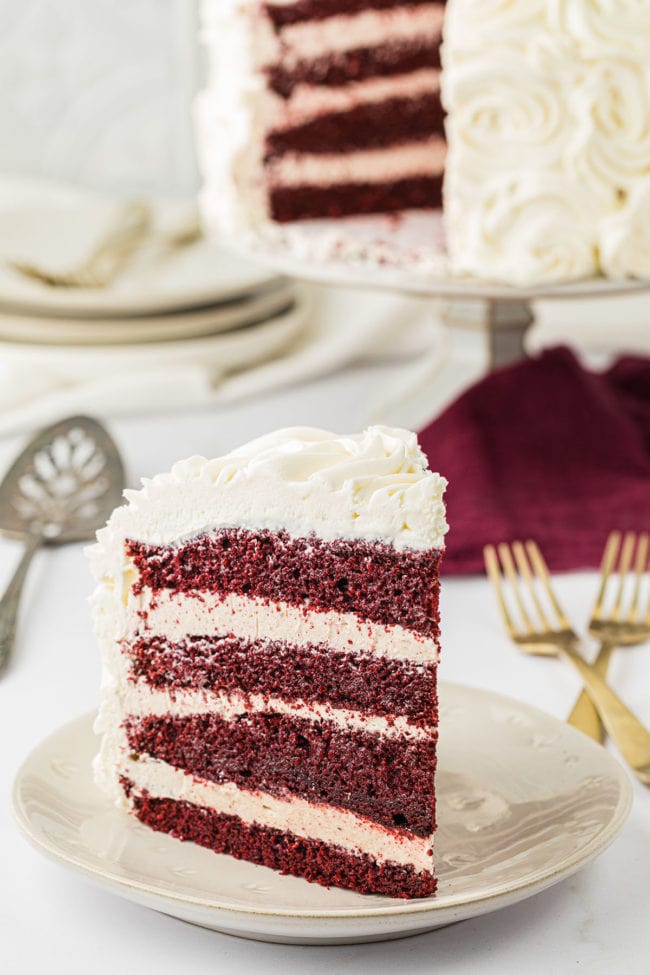
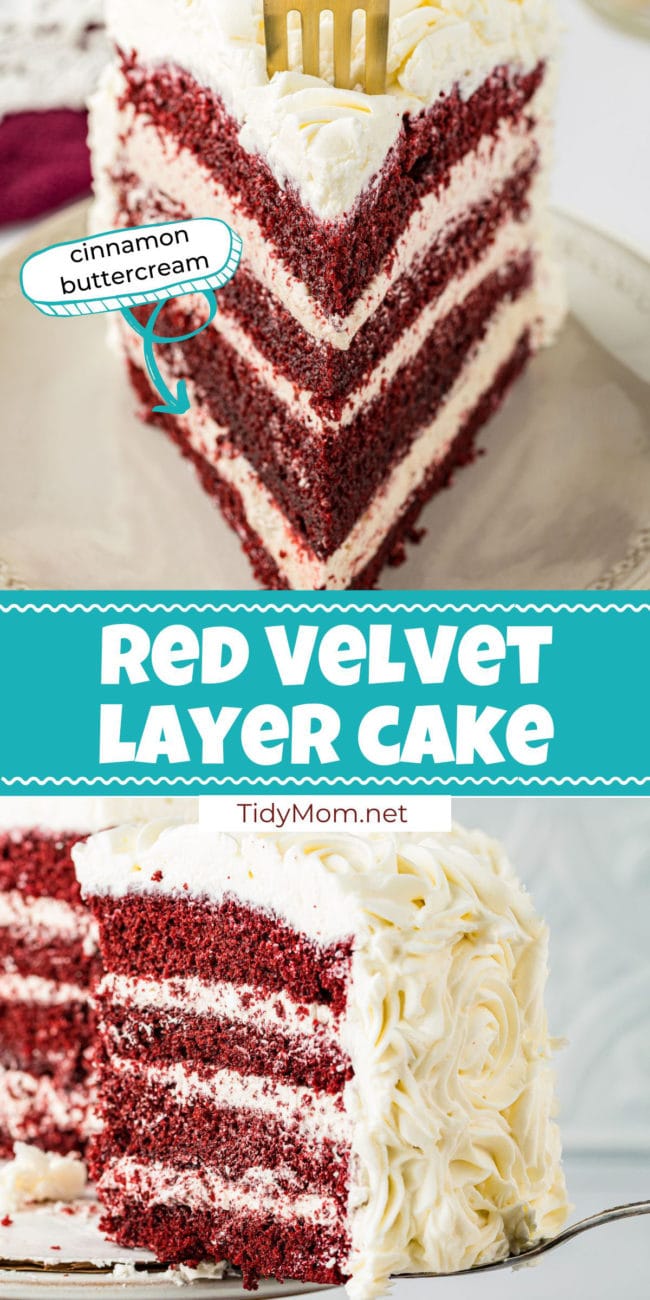
- Slather each red velvet cake layer with one cup of cinnamon buttercream filling.
- Frost the outside of the rose cake with vanilla cream cheese frosting.
- For stunning frosted roses, check out this easy rose cake tutorial video.
Red Velvet Rose Cake Recipe Notes/Tips
- If the butter is cold for the red velvet cake, it will warm quickly from the beaters.
- You may notice the batter will curdle slightly if the water is too cold; this is ok, as It will come together when you add the flour.
- I use a kitchen scale to be sure both pans are filled equally with cake batter.
- Unlike other baked goods, when you insert a toothpick to check for doneness, you should have a few moist crumbs attached, but not batter.
- You don’t have to halve the two cake layers, you can just make a two-layer cake (you might want to only make half of the cinnamon buttercream if you make a two-layer cake).
- Spread a thin “crumb coat” layer of frosting over the whole cake then refrigerate for several hours or overnight before piping the roses.
- It’s better to prep two frosting bags for piping rosettes if it’s overly warm in your kitchen or you have hot hands!
How To Store Red Velvet Rose Cake
You will want to refrigerate the cake layers before frosting. Wrap the red velvet cake layers in plastic (wrap well so they don’t dry out) and put them in the refrigerator for at least a few hours or overnight.
Refrigerate/Leftovers
Red velvet cake frosted with cream cheese rose decoration needs refrigeration. Use an airtight cake container to refrigerate it for a few days. Red velvet rose cake MUST be refrigerated because of the cream cheese frosting.
Freeze
Unfrosted cake layers can also be frozen for over a month, well-wrapped. Thaw at room temperature.
Red Velvet Cake FAQs
Heaven! A wonderful melding of chocolate with an interesting, nuanced tang tempered with tart-sweet cream cheese icing. Red velvet chocolate has a velvety moist mouthfeel that is deeply satisfying. Adding the cinnamon buttercream layers puts the whole creation over the top!
Why not?! You can use black cocoa powder for the cake and the frosting. FYI- avoid black food coloring, it will tint your teeth and mouth and lips (speaking from experience when we had black icing on a bakery cake years ago) Shake it up with blood-red piped roses!
When it’s completely cooled. If your red velvet cake is warm at all, you will have a melty mess with the frosting. Ideally, you should pop it in the fridge for a few hours before frosting, just wrap really well in plastic wrap.
Originally posted in January 2022. UPDATED January 2025. We spiffed up this post with more information. No changes were made to the recipe.
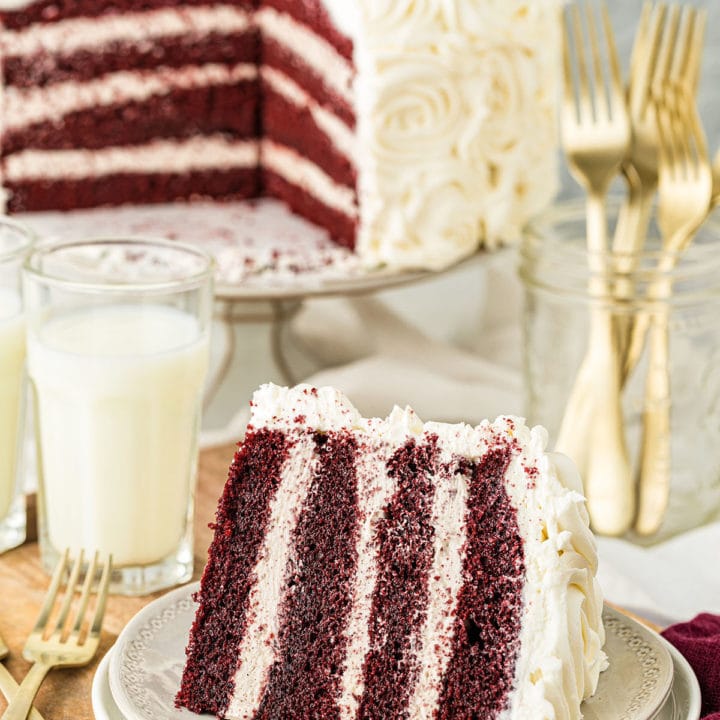
Red Velvet Cake With Cinnamon Buttercream
This rose cake is sure to make any birthday or special occasion spectacular. The red velvet cake made from scratch is soft, moist and tender, with the perfect red velvet flavor. Inside you will find fluffy cinnamon buttercream between the layers and topped with a delicious cream cheese frosting. A cake they will never forget!
Ingredients
Red Velvet Cake
- 2 cups all-purpose unbleached flour
- 1/2 cup natural cocoa powder
- 2 teaspoons baking powder
- 1/2 teaspoon baking soda
- 4 Tablespoons powdered ButterMilk
- 1 teaspoon salt
- 1 cup water
- 1 tablespoon vanilla extract
- 4 tablespoons (2 ounces) liquid red food coloring (or 2-3 teaspoons if using gel color)
- 1 cup unsalted butter; can be cold from the refrigerator
- 1 1/2 cups sugar
- 4 large eggs, room temp
Cinnamon Butter Cream
- 1 cup butter (softened)
- 1 cup vegetable shortening
- 1 pinch of salt
- 1/4 teaspoons vanilla extract
- 4 cups powdered sugar
- 1-2 teaspoons ground cinnamon
- 1/3 cup heavy whipping cream
Vanilla Cream Cheese Frosting
- 1 cup butter, at room temperature
- 16 ounces cream cheese, at room temperature
- 2 teasoons vanilla extract (clear vanilla will help keep frosting white)
- 8 cups powdered sugar
- 3-6 Tablespoons heavy whipping cream
- White gel food coloring (optional, but makes your frosting nice and white)
Instructions
for Red Velvet Cake
- Preheat to 350° F
- Generously grease two, 9- x 2-inch pans with non-stick spray or shortening.
- In a medium-sized bowl, after measuring, sift together the flour, cocoa powder, baking powder, baking soda, powdered buttermilk, and salt. Stir together with a spoon. Set aside.
- Mix the water with the food coloring and vanilla extract. Set aside.
- Using a stand mixer with a paddle attachment, beat the butter on low speed until soft. (If the butter is cold, it will warm quickly from the beaters - taking about 60 seconds).
- Slowly add sugar in a steady stream at the side of the bowl. Increase speed to medium and beat for 2 minutes until light yellow and fluffy. Stop the mixer and scrape the side and bottom of the bowl with a large rubber spatula.
- With the mixer on low, add the eggs one at a time and beat for 20 seconds after each addition.
- Increase the mixer speed to medium and beat the mixture for 2 minutes. be sure to use a kitchen timer to help you keep track of the time. The mixture will become fluffy and aerated.
- Add the flour mixture in 3 equal portions, alternating with the water in 2 equal portions, beginning and ending with the flour. (If the water is cold, the batter will curdle slightly. It's ok. It will come together when you add the flour.) Mix on low and work quickly so you don't over-mix.
- After completing the last addition of flour, stop the mixer, and scrape the side and bottom of the bowl with a large rubber spatula.
- Then, let the mixer run for 30 seconds on LOW. The batter will be thick and fluffy. STOP the mixer. Do NOT overmix.
- With a large rubber spatula, give the batter ONE or TWO quick folds to incorporate any stray flour or liquid left at the sides and bottom of the bowl. do not continue mixing!
- Divide the batter equally into the prepared pans and lightly smooth their tops. The pans should be about 1/2-full.(I use my kitchen scale to be sure both pans are equal)
- Bake the cake layers for 20 to 30 minutes or until the top feels firm and gives slightly when touched. (inserted a toothpick in the middle should have a few moist crumbs attached, but not batter.)
- Loosen the sides with a small metal spatula or sharp knife. Invert onto a cake rack and place upright to cool completely until they are no longer warm. Then, wrap the cakes up tight with plastic wrap and put them in the fridge for at least 2-3 hours or overnight before frosting.
For Cinnamon Buttercream
- In a mixing bowl, blend butter and shortening until smooth. Add a pinch of salt, vanilla, and cinnamon. Continue mixing until well blended. Gradually add powdered sugar 1 cup at a time, beating well after each addition. Eventually, you will have a very thick gooey mixture. On the highest speed of your mixer, stream in the heavy whipping cream- pour nice and slow.
- Continue beating on high speed until the frosting is fluffy
For Vanilla Cream Cheese Frosting
- Place butter in a large mixing bowl and blend slightly. Add cream cheese and blend until combined, about 30 seconds.
- Add vanilla and sugar and blend on low until combined. Increase to medium speed and beat until it begins to get fluffy.
- Slowly add the cream a little at a time until desired consistency is met. (you want it thick enough to hold its shape if you are going to pipe on roses)I added some bright white gel coloring at this point to make my frosting nice and white.
- Beat until fluffy, about 1 minute.
To Assemble Rose Cake
- Remove cakes from the fridge.
- Using a long serrated knife, slice both cold cake layers in half horizontally, yielding 4 cake layers (you can leave your cake as 2 thicker layers with one layer of filling if you'd prefer).
- Top each cake layer with about 1 cup of cinnamon buttercream.
- Frost the outside of the cake with Vanilla Cream Cheese Frosting.
- You can go to youtube to follow a rose cake tutorial.
- Enjoy!
Notes
STORAGE
- Unfrosted cake layers can be refigerated well wrapped for a few hours or overnight before frosting. A cold cake is much easier to frost.
- Unfrosted cake layers can be frozen for more than one month, well wrapped. Thaw at room temperature.
- DECORATED CAKE STORAGE: Cream Cheese Frosting needs refrigeration, so this cake MUST be refrigerated, where the cake will keep for a few days.
Nutrition Information:
Yield: 14 Serving Size: 1Amount Per Serving: Calories: 1187Total Fat: 71gSaturated Fat: 41gTrans Fat: 1gUnsaturated Fat: 26gCholesterol: 212mgSodium: 614mgCarbohydrates: 134gFiber: 1gSugar: 115gProtein: 7g
Nutrition information is estimated based on the ingredients and cooking instructions as described in each recipe and is intended to be used for informational purposes only. Please note that nutrition details may vary based on methods of preparation, origin, and freshness of ingredients used and are just estimates. We encourage, especially if these numbers are important to you, to calculate these on your own for most accurate results.

Tidymom is a participant in the amazon services llc associates program, an affiliate advertising program designed to provide a means for sites to earn advertising fees by advertising and linking to Amazon.com.
Please respect my work, recipes and photographs. If you do use a recipe in your own writing, please give proper credit and link back to the original post.

That cake is beautiful, love it!
This is DIVINE! I want to eat it all! Here from TT&J!
What a BEAUTIFUL cake! I’ve been wanting to make a rose cake like this for the longest time too… I’ll have to give it a try sometime soon! This looks fabulous (and really delicious too!)
What a gorgeous cake! I would love for you to share this or any of your great ideas at the link party going on now (and every Saturday through Tuesday) at ‘Or so she says …’
love it so fanciful
what a gorgeous cake, cheryl!
Hi Cheryl, cake looks spectacular, 2 problems for me though, ’cause I do not live in USA: unbleached flour and powdered buttermilk… which would be the appropiate substitutes, thanks in advance, Consuelo