Red White & Blue Candy Apples
This post may contain Amazon or other affiliate links. As an Amazon associate, I earn from qualifying purchases.
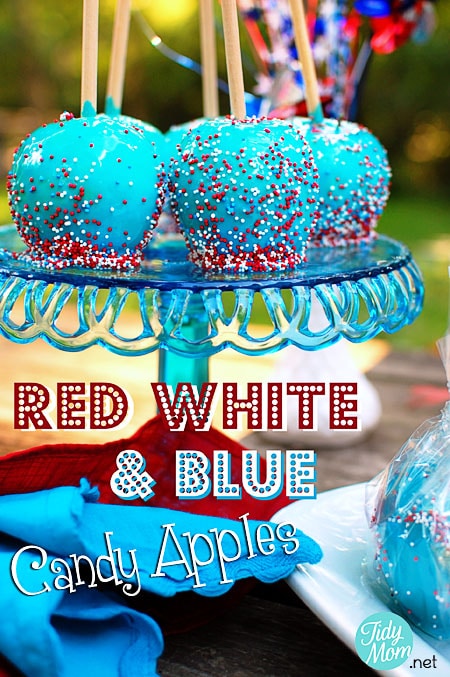
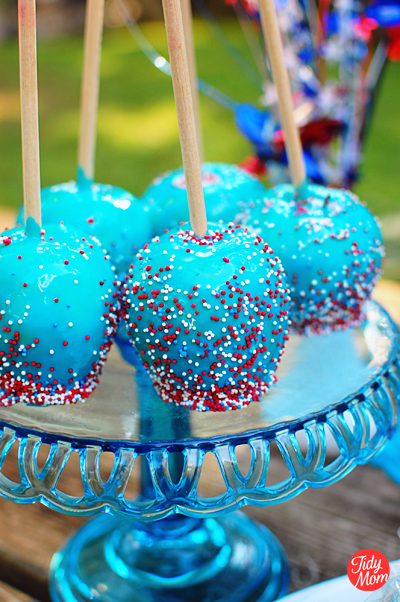
A layer of chewy blue raspberry candy coats a crisp, tart apple in this old-fashioned favorite, Red White & Blue Candy Apples.
If you follow me on twitter or facebook, you probably saw all my hints and teases all weekend about “what am I making”.
I don’t remember how it happened really, but one day while stumbling around on the internet I ran into Blue Raspberry Candy Apple Magic Mix. The instant I saw it I knew I had to make some Red White and Blue Candy Apples for 4th of July!
I’m a big fan of caramel apples and candy apples. Most of the time I only get them in the fall when I see those cute little Happy Apples all over my grocery store. I’ve never made candy apples before, I thought how hard could it be!
HA!……well, let me tell you, it’s NOT hard if you have the correct directions and a little information.
My first attempt was failure. I hung my head as tears rolled down my cheeks. My apples LOOKED pretty. They looked as good as I had envisioned.
Only one problem………the candy coating was ROCK hard! like a sucker! You couldn’t even cut it with a knife, much less bite in with your teeth.
So I crawled in to bed defeated, I tossed and turned all night, wondering why my apples didn’t turn out….was the “magic” that it turns your apple to a sucker? 🙁 couldn’t be.
Day 2 I got up determined to give it another try.
After speaking to my friend Cindy, I discovered the package directions suggest heating your candy mixture to 300°, will yield candy like a sucker. She suggested I try 250°. …………..and guess what?! THAT was it!!!! I had a nice caramel/taffy consistency on my apples!
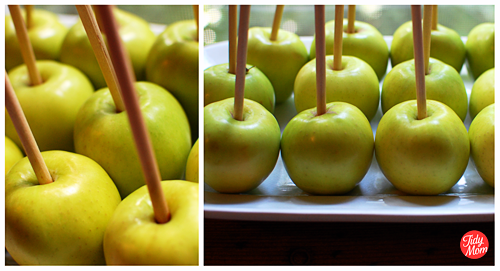
Table of Contents
HOW TO MAKE CANDY APPLES
Supplies for Blue Candy Apples
(click items to find them online)
- Apples – I used Granny Smith, but any firm tart apple will work.
- Blue Raspberry Candy Apple Magic Mix **NOTE** do NOT follow temperature directions on package for cooking, unless you want a hard candy coating
- Sugar & water (per instructions on bag)
- wooden spoon for stirring
- 2 small bowls for sprinkles
- baking sheet pan to place covered apples on
Prepare your apples and kitchen/supplies:
- Wash and dry apples and remove stems
- insert sticks in apples
- Line baking sheet with waxed paper and spray heavily with non-stick spay (you will place coated apples on this)
- Pour Sprinkles into one bowl. (leave one bowl empty)
DIRECTIONS
one bag of Candy Apple Magic can coat up to 100 apples – so I only used 1/2 of the package.
- Combine 1/2 package of Blue Raspberry Candy Apple Mix with 2.5 pounds granulated sugar and 1 cup water in large sauce pan over medium heat stirring until sugar is dissolved
- Place candy thermometer on pan (not touching bottom of pan)
- Increase heat to medium high heat, do NOT stir and cook until candy thermometer reaches exactly 250° F. This took about 15 mins, but can be different according to your stove, so watch carefully. (NOTE: the package say 300° you do NOT want to cook to 300° or your candy will be too hard)
- When temp reaches 250° remove pan from heat and dip apples working quickly. * BE VERY CAREFUL candy coating is very hot and will burn your skin
- I sprinkled each apple right after dipping – I held the freshly dipped apple over an empty bowl while showering with sprinkles. (I had to work very quickly, as they did not want to stick well )
- Place on lined & greased pan and continue with rest of the apples.
- Place in refrigerator to cool.
- Once your apples have cooled, you can eat and enjoy! Make sure to eat them within three days of making them, and I would recommend storing in the refrigerator. We left ours out over night in the air conditioned house and they melted quite a bit.
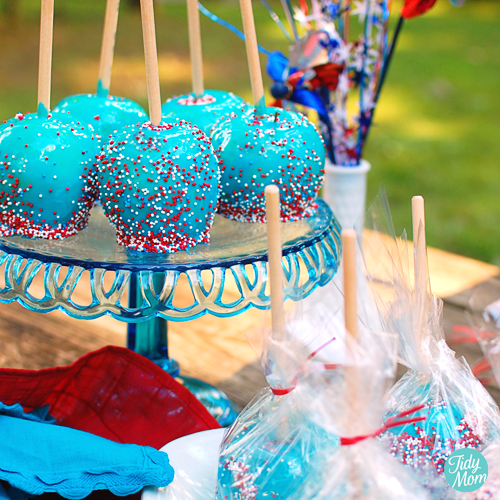
If you’d like to give some as gifts or party favors, cover in cellophane and tie off with a pretty ribbon or red twisty tie.
Helpful sites on Candy and Candy Apple Making
Cooking stages of candy making (wish I had found this site the first day)
How to Make Candy Apples (great how to video)
I just LOVE the way they turned out! and they were every bit as chewy and delicious as I had anticipated!! I’m glad I gave them a second chance!!
I think these would be adorable for a 4th of July celebration!!
More 4th of July recipes and crafts you may enjoy:
Fourth of July Marshmallow Pops
Fourth of July Free Printables
Fourth of July Cupcakes in a Jar
Red & Hot Boom gift and printable
Red White and Blue Star Cookies

Tidymom is a participant in the amazon services llc associates program, an affiliate advertising program designed to provide a means for sites to earn advertising fees by advertising and linking to Amazon.com.
Please respect my work, recipes and photographs. If you do use a recipe in your own writing, please give proper credit and link back to the original post.

