DIY Dry Erase Menu Board | 10 Minute Idea
This post may contain Amazon or other affiliate links. As an Amazon associate, I earn from qualifying purchases.
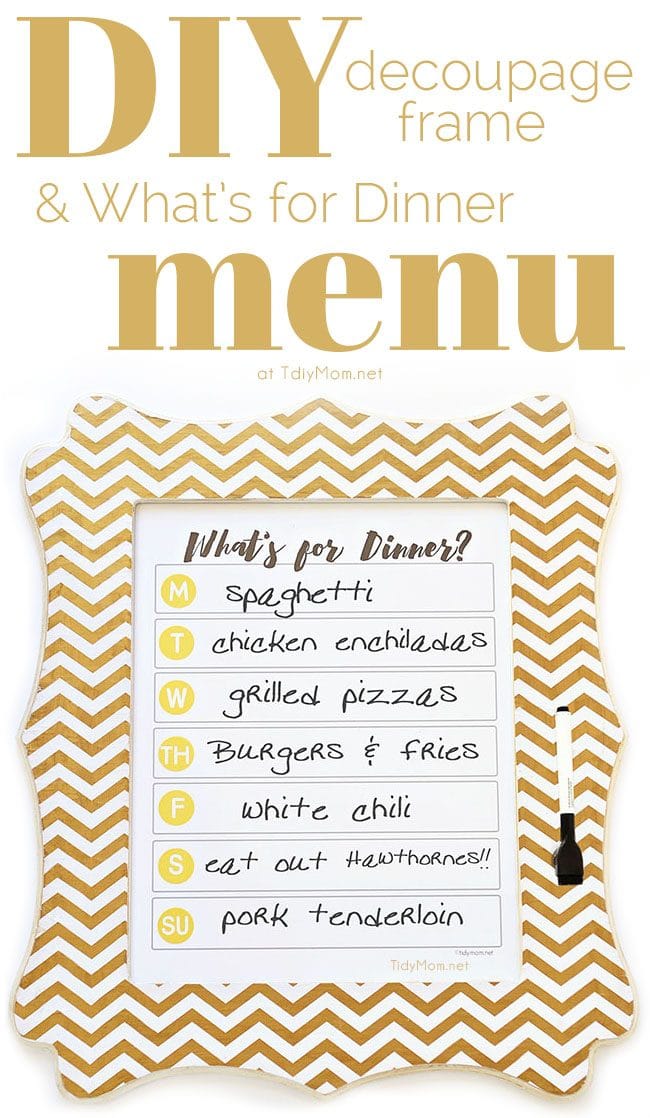
Making your own DIY Dry Erase Menu Board is a simple with this free “What’s for Dinner” printable, making dinner prep a breeze!
![]()
“What’s for dinner?” probably the most heard question in every household in the history of forever! right?
I’ll be honest, I’m not big on meal planning. I head to the grocery store about once a week (sometimes every 2 weeks) and I usually have a few recipes in mind that I would like to make that week and the rest I just buy what sounds good while I’m shopping. But here’s the problem, if I don’t write down what I bought for meals then I don’t remember what I bought or planned to make for the week. So I’ve been keeping a list on a door in the kitchen, but I recently decided I wanted something that looked nice.
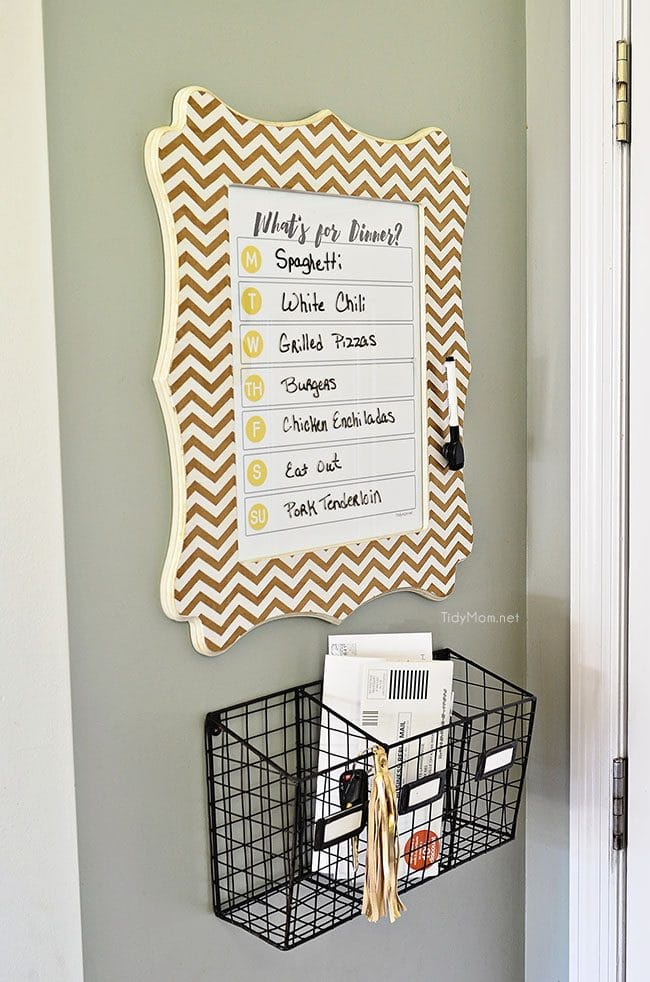
I wanted something simple, just for dinners, that I could place in a frame with glass, and use like a dry erase board. I made a DIY Dry Erase Menu Board along with a “What’s for Dinner” printable I’m sharing it with you today and hope you’ll get some use out of it too!
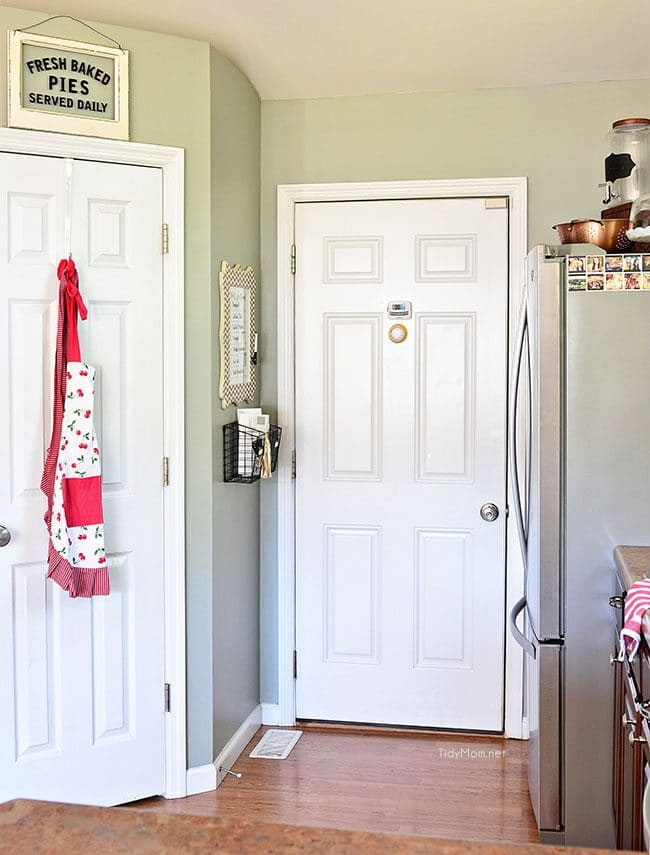
I don’t have a lot of available wall space in our kitchen, but the DIY Dry Erase Menu Board fit perfectly on the wall near the fridge and pantry. The other door leads to the garage, so I hung a basket underneath for keys, mail and other notes.
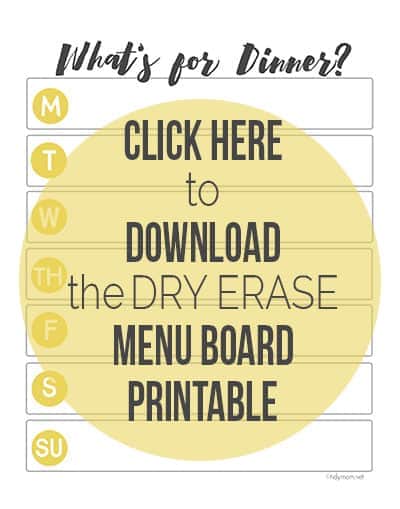
I love it! It’s simple and classy, while serving a fabulous purpose. Everyone in the house knows what’s for dinner and I don’t forget my meal plan! To print the Free 8″x10″ Menu Planner Printable, just click on the image below.
Make a DIY Dry Erase Menu Board with a decoupage frame like mine
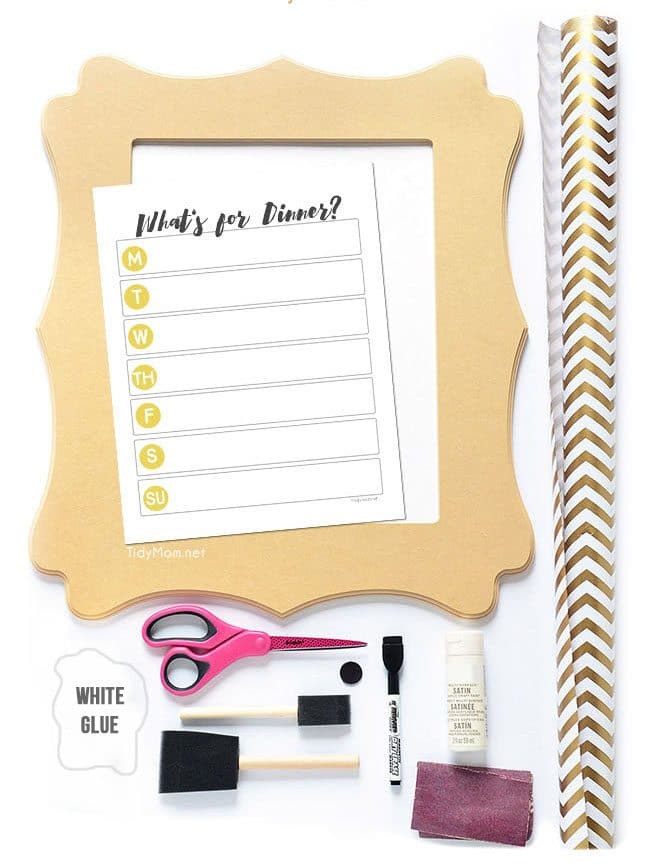
Supplies Needed for DIY Dry Erase Menu Board
- unfinished wood frame with glass (8”x10” or 11”x14”)
- wrapping paper, scrapbook paper or fabric
- Scotch Brand Scissors
- Decoupage or white glue
- 2 sponge brushes (one for paint, one for glue)
- craft paint
- sand paper
- pencil
- dry rag (cloth)
- dry erase marker
- magnet (optional)
- What’s For Dinner free printable (Click HERE to Download Dry Erase Menu Printable)
Directions:
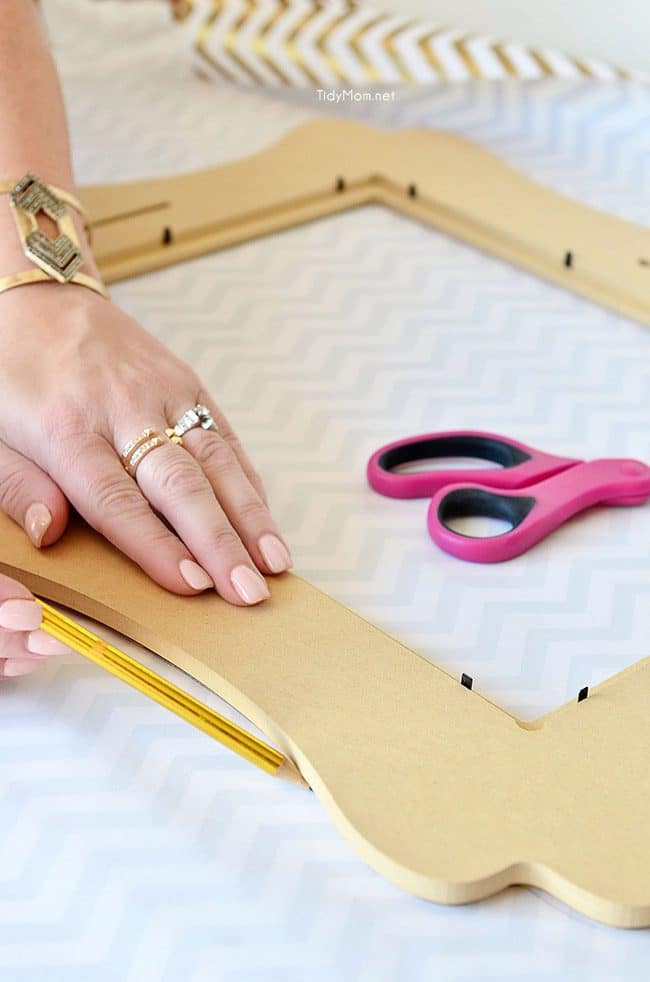
- Lay a piece of wrapping paper, scrapbook paper or fabric face down on a cutting surface, place unfinished wood frame face down on top of paper, and trace frame shape onto backside of paper. Be sure to remove glass from frame and trace the opening.
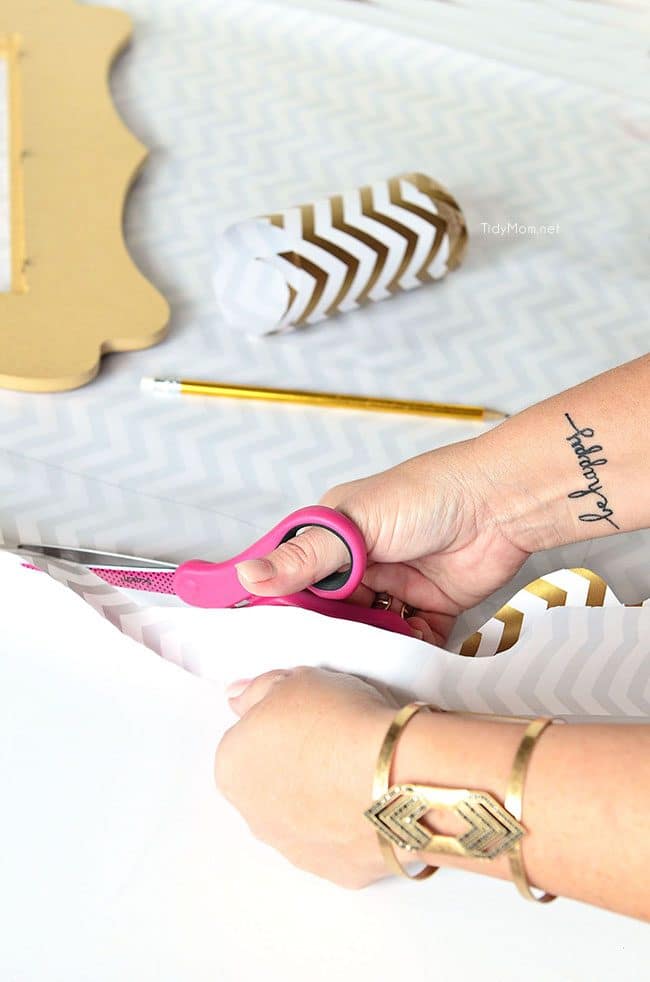 2. Use Scotch-Brand Scissors to carefully cut out frame shape and opening.

3. Paint frame using sponge brush and craft paint. Be sure to paint the inside and outside edges as well. Let the paint dry, then use another sponge brush to cover the front surface of the frame with a thin layer of decoupage (or white glue).
4. Working quickly, but carefully, place cut out paper on top of frame, making sure to smooth out any bubbles. Set aside to dry. Use sandpaper to smooth out all of the sides/edges of the paper. Wipe with dry cloth to remove dust, cover your frame, including all edges, with 2 layers of decoupage (or white glue). Let it dry about 10-15 mins. between each coat.
5. Once frame is dry, place glass and “What’s for Dinner” menu printable in frame.
6. Optional Step – glue a small magnet to front of frame and and another one to a dry erase marker to keep marker handy.
Once you place your print in the frame, you can use the dry erase marker directly on the glass to plan out your menu.
We love to make decoupage frames for printables and photos. This is the first time I’ve made one this large using wrapping paper. It was a little more tricky, when I make smaller ones I use scrapbook paper, which is a little easier to work with. But I love how the chevron wrapping paper turned out!
![]()
Of course you can put your Dry Erase Menu in any frame you’d like. The DIY Dry Erase Menu Board is so simple and it’s making dinner prep quick, organized and easy. Perfect for this months 10 Minute Idea – Easy Dinner Prep.
This series is based on the idea that sometimes ten minutes is all we have but that doesn’t mean we can’t use that time to come up with beautiful and useful ideas. Each month, a fabulous team of creative bloggers will be sharing ideas with you, so make sure you scroll all the way through to find the other projects.
To find the rest of this month’s 10 Minute Ideas, you can visit my friends.
Finding Home Farms, Dream Green DIY, Four Generations One Roof and Julie Blanner.

Disclaimer: I have a working relationship with Scotch Brand. As always, all views and opinions are my own. Thank you for supporting the amazing brands who make TidyMom possible!
Hi there, I'm Cheryl!
As a wife, mom, and caffeine enthusiast, my journey has taken me from bustling mornings with my family to sharing delicious recipes, home care tips, and heartfelt decorating insights with wonderful readers like you. My love for baking, photography, and tidiness shines through every post I craft. Dive into my world and discover the art of homemaking, one tidy moment at a time. Read more...
Tidymom is a participant in the amazon services llc associates program, an affiliate advertising program designed to provide a means for sites to earn advertising fees by advertising and linking to Amazon.com.
Please respect my work, recipes and photographs. If you do use a recipe in your own writing, please give proper credit and link back to the original post.
That’s a great idea!
This is beyond adorable!! I need to make one asap so Ben and I can work on our meal planning strategy!
Love this idea – and so cute as well!!! Thanks for sharing.
Oh, how adorable!!! I love how this doubles as a piece of art, too. Beautiful!
Wrapping paper!
I love these DIY projects of yours, Cheryl. This is such a cute and useful idea, because we all get the “What’s for dinner tonight?”
Making the menu will make it easier to plan the week, too. I’ll have to do this!
Such a cute idea! It might actually plan out my week for a change 🙂 And if I could get someone to cook me YOUR yummy menu, I’d be thrilled.
Great idea for “What’s for dinner” menu! I think I’ll steal your idea if you don’t mind)
This is a wonderful idea! Question – where did you find the frame? I have not been able to find one. TIA!