Chocolate Peppermint Kiss Cookies
This post may contain Amazon or other affiliate links. As an Amazon associate, I earn from qualifying purchases.


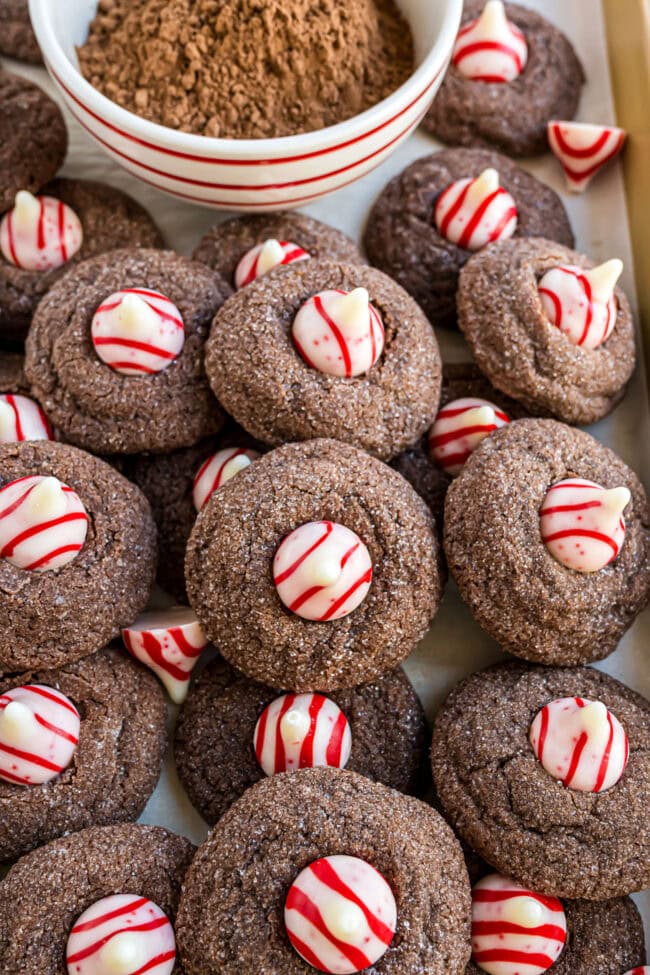
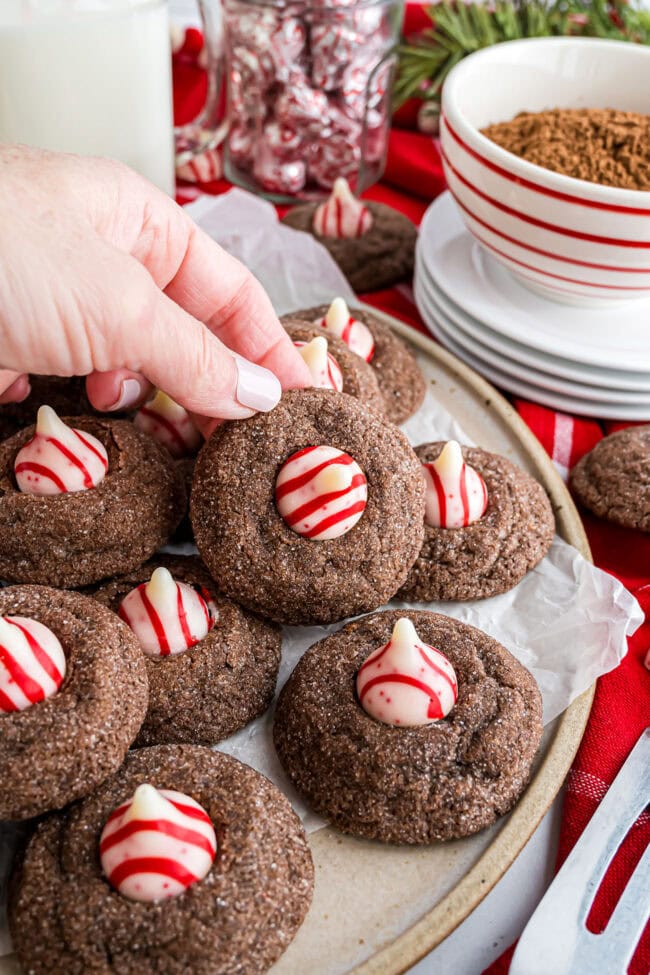
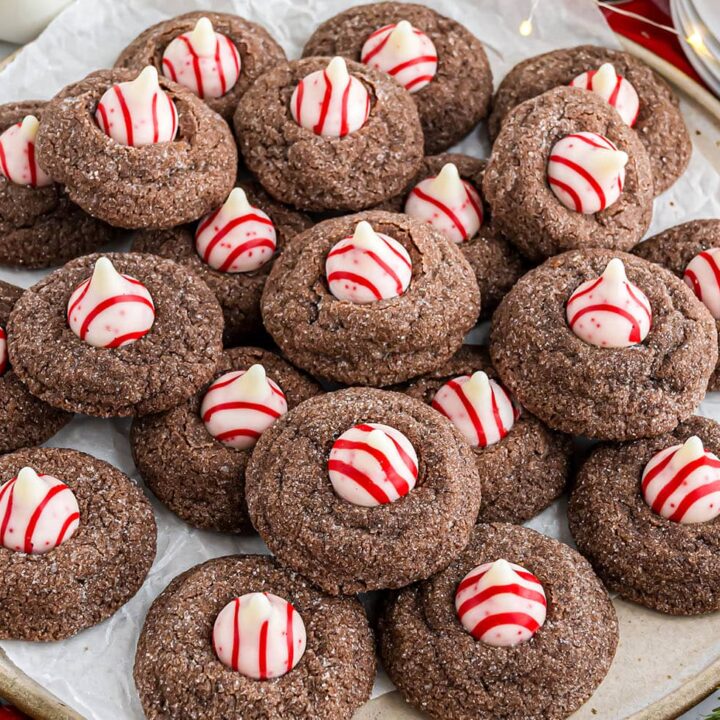
Chocolate Peppermint Kiss Cookies are soft, fudgy peppermint-packed chocolate cookies topped with candy cane Hershey’s Kisses. They’re festive, delicious, and perfect for holiday cookie trays.
Meet your new holiday cookie star! Chocolate Peppermint Kiss Cookies are rich, fudgy, and full of cool peppermint flavor—each one topped with a striped candy cane Hershey’s Kiss for that classic blossom-cookie look. They’re easy to make, gorgeous on any cookie tray, and guaranteed to disappear fast.
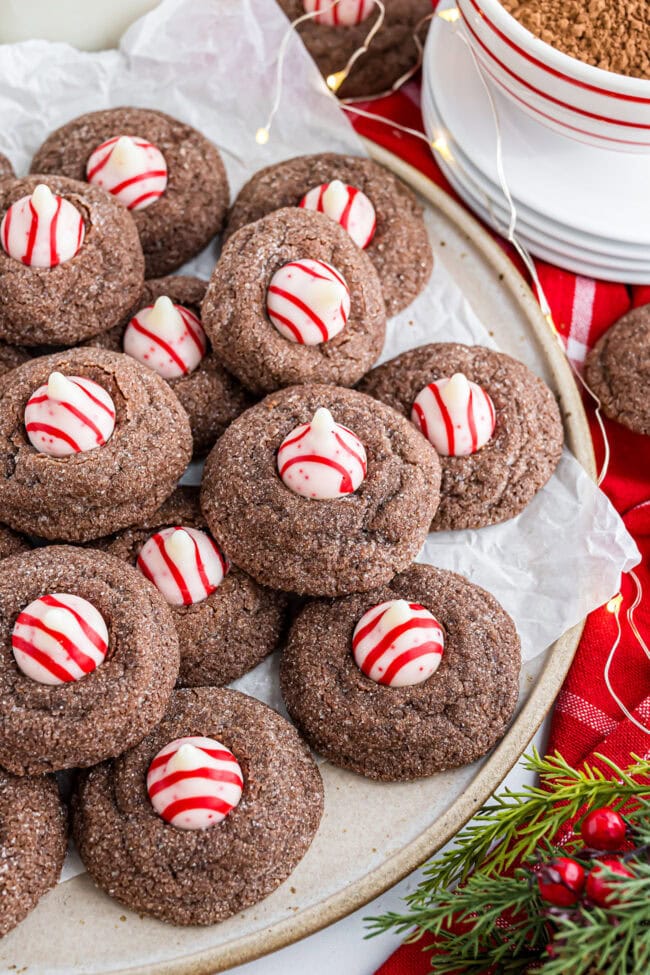
Table of Contents
Why These Chocolate Peppermint Cookies Are So Good
- Soft, fudgy chocolate cookie base
- Cool peppermint flavor in every bite
- That signature candy cane Kiss on top
- Easy, freezer-friendly dough
- Perfect for gifting, parties, and cookie trays
- A fun twist on classic blossom cookies
If you’re in the baking groove, don’t stop now — there are plenty more treats waiting in my kitchen. Try the irresistible Peanut Butter Cup Cookies, soft and sweet Gooey Butter Cookies, classic Chocolate Chip Cookies, or colorful Soft Baked Sprinkle Cookies.
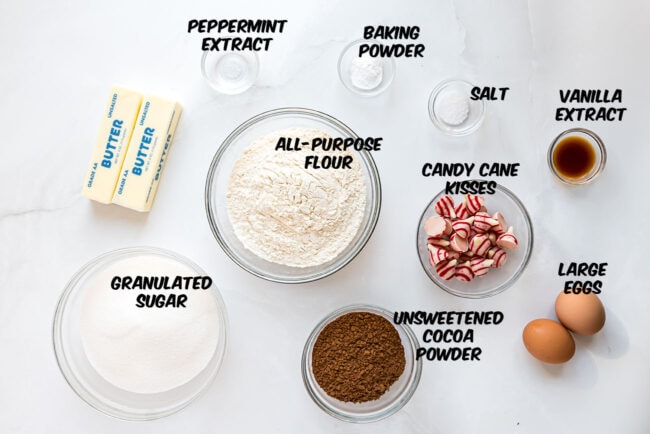
Ingredients You’ll Need For These Kiss Cookies
For specific amounts, please refer to the printable recipe card at the bottom of the post.
- All-purpose flour – Weigh for accuracy, or use the spoon-and-level method (here’s a great video from King Arthur Baking).
- Unsweetened cocoa powder – Natural cocoa works best; Dutch-process makes them darker and richer.
- Baking powder – Helps the cookies bake up soft and fluffy.
- Salt
- Butter – softened
- Granulated sugar
- Eggs – room temperature
- Vanilla extract
- Peppermint extract
- Peppermint Candy Cane Hershey’s Kisses – unwrapped
I always unwrap the Kisses before I start baking — future me never regrets it.
How to Make These Chocolate Peppermint Blossoms
When you are making this recipe, you’ll want to use the full recipe at the bottom of the page.
- Whisk the dry ingredients together in a bowl.
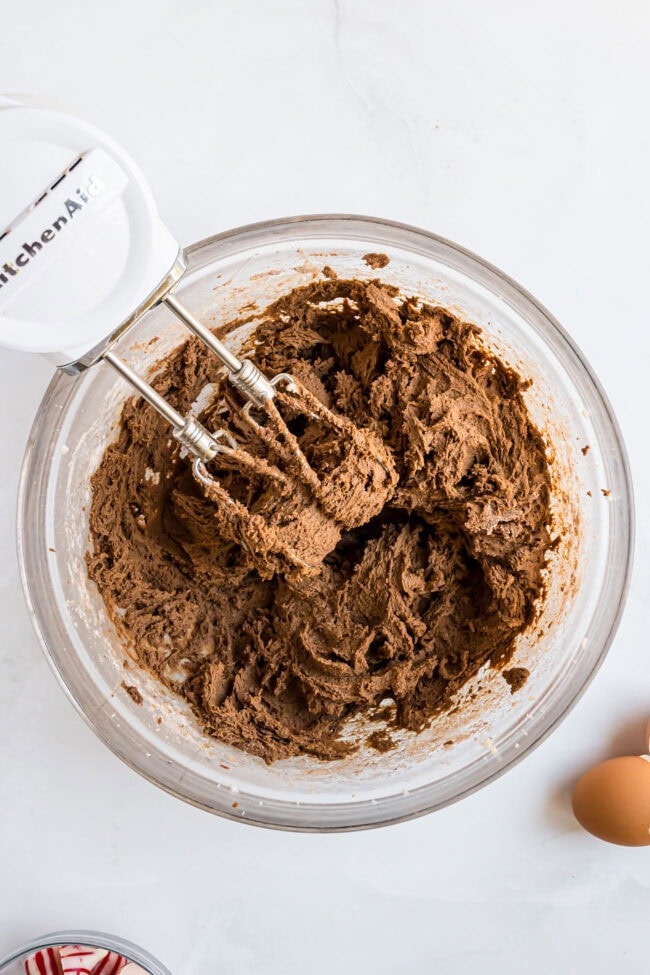
- Use an electric mixer to cream the butter and sugar, then mix in the eggs, vanilla, and peppermint.
- Add the dry mixture and mix just until combined.
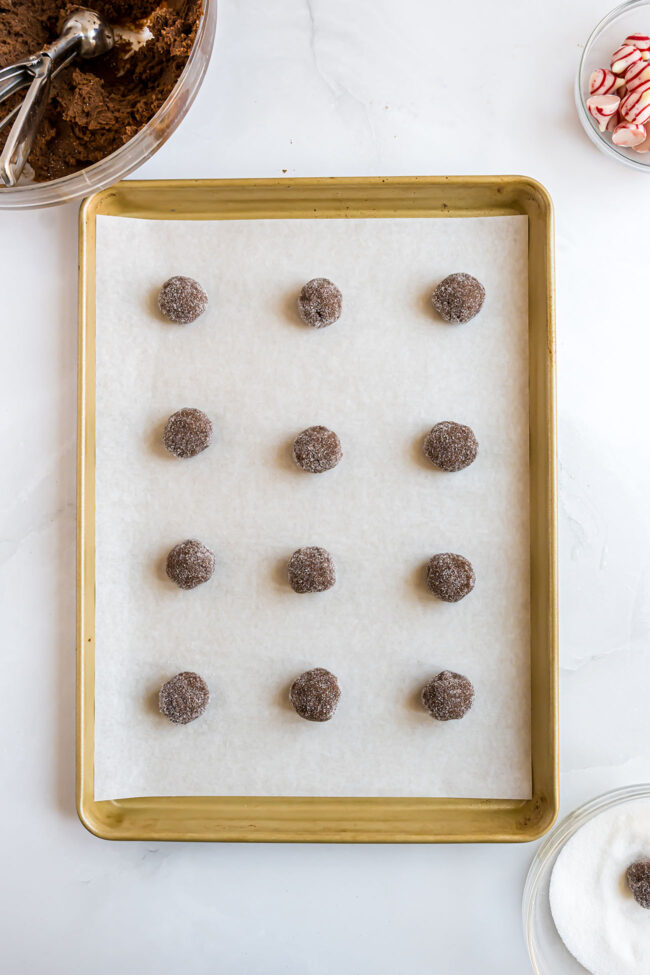
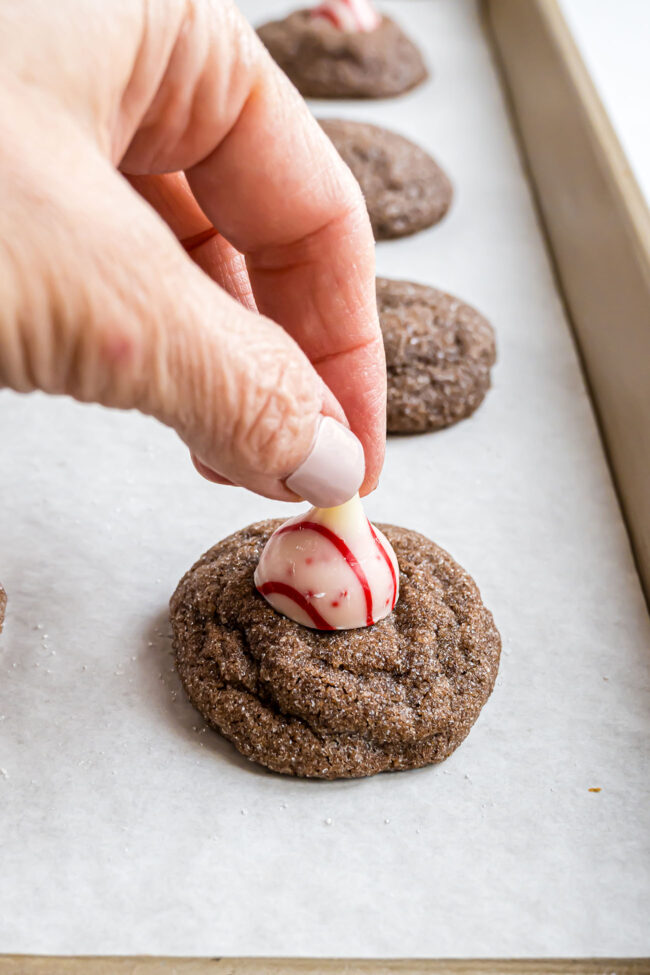
- Roll the dough into 1-inch balls, coat in sugar, bake until set, then top each warm cookie with a peppermint Kiss and cool completely on a wire rack.
I like to sneak one while they’re still warm — strictly for quality control, of course. 😉
Baking Tips You’ll Be Glad You Know
- Let baked cookies rest on the pan for 2–3 minutes before adding the Kisses — too hot and they may melt.
- The cookies should be warm enough to soften the Kisses slightly so they “stick,” but not so warm that they lose their shape.
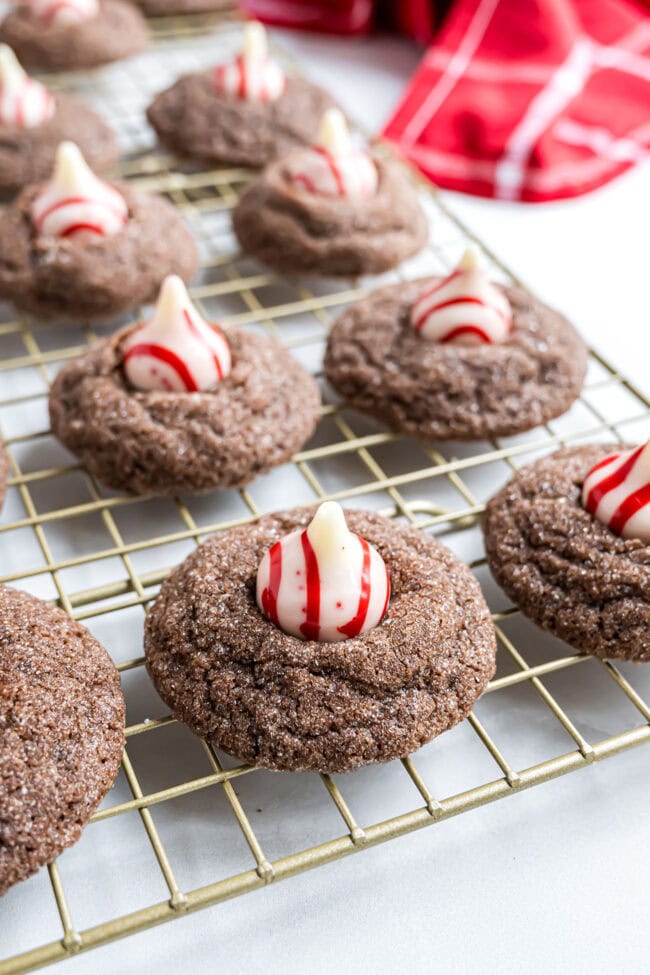
- Move cookies to a wire rack so the Kisses can cool and set properly.
- If the Kisses are melting too much, chill them in the fridge or freezer for 10 minutes before using.
- If the Kisses aren’t softening at all, the candy may be older — fresh Kisses soften best.
- Press the Kisses straight down (no twisting!) so they settle neatly into the cookie.
If your dough feels a little sticky, a quick 10–15 minutes in the fridge works like magic.
How to Store & Make These Kiss Cookies Ahead
Storing the Cookies
Keep cooled cookies in an airtight container for 4–5 days.
If stacking, add parchment between layers to protect the Kisses.
Freezing Baked Cookies
Freeze completely cooled cookies in a single layer until firm, then transfer to a freezer-safe container.
Thaw at room temperature.
Freezing the Dough
- Scoop dough into balls.
- Freeze on a lined tray until solid.
- Move to a freezer bag or airtight container and label.
- Freeze up to 6 months.
- Bake from frozen (add a minute or two).
- Press Kisses on after baking.
Make-Ahead Tip
You can mix the dough up to 24 hours ahead, roll into balls and chill until ready to scoop. If the dough firms up too much, let it sit at room temp briefly.
Fun Variations to Try
- Swap in dark chocolate mint Kisses for a richer flavor.
- Add crushed candy canes to the dough for double peppermint.
- Mix in mini chocolate chips for more chocolate in every bite.
- Skip the peppermint extract and use chocolate Kisses for a classic blossom.
- Use milk or dark chocolate Kisses for an everyday, non-holiday look.
Cookie Questions, Answered FAQs
Too much flour — be sure to weigh your flour or use the spoon-and-level method.
You can, but the sugar adds sparkle and a light crunch.
Absolutely! Milk chocolate, dark chocolate, hot cocoa, and mint Kisses all work.
You CAN make these cookies a little larger, but just note that the chocolate Kiss get’s a little lost on a larger cookie.
Yes — they soften when pressed onto the warm cookie but firm back up as they cool.

The origin of these cookies: The very first blossom-style cookie debuted in 1957, created by Freda Strasel Smith for the Pillsbury Bake-Off Contest.
Chocolate Peppermint Kiss Cookies are everything you want in a chocolate–peppermint treat — soft, fudgy, festive, and incredibly easy to make. Whether you’re baking for the holidays or just craving something sweet, these blossom-style cookies always hit the spot.
Chocolate Peppermint Kiss Cookies
Soft, fudgy chocolate peppermint cookies made with peppermint extract and topped with a candy cane Kiss. A festive, crowd-pleasing twist on classic blossom cookies.
Ingredients
- 2 cups all-purpose flour (240 g)
- ⅔ cup unsweetened cocoa powder
- 1 teaspoon baking powder
- ½ teaspoon salt
- 1 cup butter, softened
- 2 cups granulated sugar (divided)
- 2 eggs - room temp
- ½ teaspoon vanilla extract
- ½ teaspoon peppermint extract
- 2 bags Peppermint Candy Cane Hershey Kisses brand chocolates, unwrapped (you will need about 45 kisses unwrapped
Instructions
- Heat oven to 350°F and line a baking sheet with parchment or a Silpat.
- Whisk the flour, cocoa powder, baking powder, and salt in a medium bowl; set aside.
- Using an electric mixer, cream the butter and 1½ cups sugar for 3–5 minutes on medium, until light. Mix in the eggs and extracts until light and fluffy (1-2 minutes).
- Add the dry ingredients to the mixer and blend on low until the dough comes together — careful not to overmix.
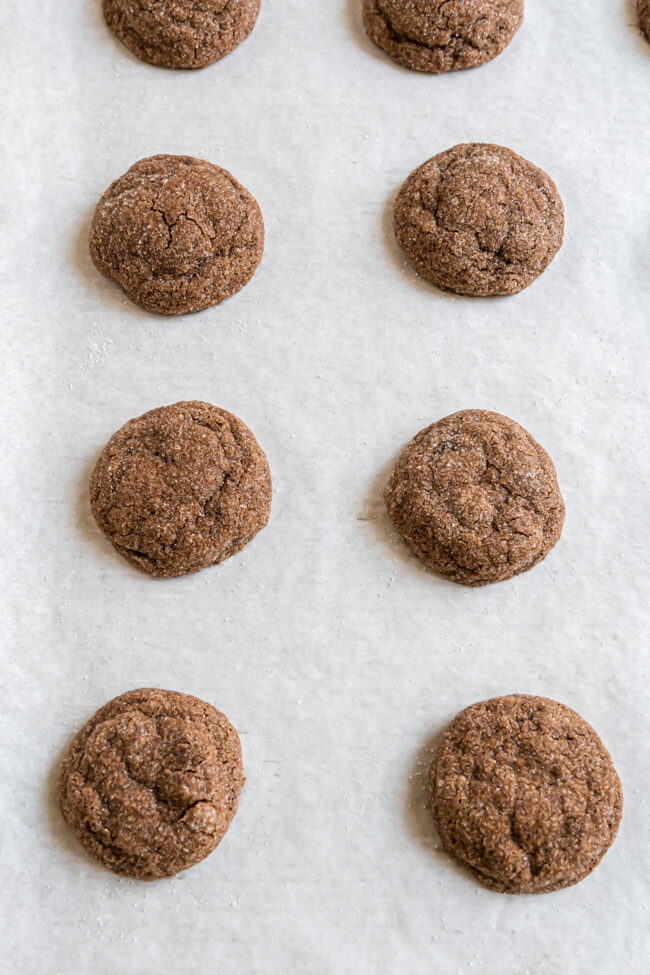
- Place the remaining ½ cup sugar in a small bowl. Scoop the dough into 1-inch balls (a cookie scoop makes this easy), roll in sugar, and place on the baking sheet. Gently press to flatten each one before baking.
- Bake in the center of the oven for 8–10 minutes. Cookie centers should be soft. Remove pan from the oven and allow the cookies to cool on the pan for 2–3 minutes, then gently press a peppermint Kiss into the center of each warm cookie.
- Transfer the cookies to a wire rack to cool completely… though grabbing one while it’s warm is highly understandable.
- Cool completely and enjoy!
Notes
Storage: Store cooled cookies in an airtight container for 4–5 days. Place parchment between layers to protect the Kisses.
Freeze Baked Cookies: Freeze in a single layer, then transfer to an airtight container. Thaw at room temperature.
Freeze Dough: Scoop into balls and freeze until firm. Store up to 6 months. Bake from frozen (add 1–2 minutes), then press Kisses on after baking.
Nutrition Information:
Yield: 45 Serving Size: 1Amount Per Serving: Calories: 142Total Fat: 5gSaturated Fat: 3gUnsaturated Fat: 2gCholesterol: 20mgSodium: 76mgCarbohydrates: 22gFiber: 1gSugar: 11gProtein: 2g
Nutrition information is estimated based on the ingredients and cooking instructions as described in each recipe and is intended to be used for informational purposes only. Please note that nutrition details may vary based on methods of preparation, origin, and freshness of ingredients used and are just estimates. We encourage, especially if these numbers are important to you, to calculate these on your own for most accurate results.

Hi there, I'm Cheryl!
As a wife, mom, and caffeine enthusiast, my journey has taken me from bustling mornings with my family to sharing delicious recipes, home care tips, and heartfelt decorating insights with wonderful readers like you. My love for baking, photography, and tidiness shines through every post I craft. Dive into my world and discover the art of homemaking, one tidy moment at a time. Read more...
Tidymom is a participant in the amazon services llc associates program, an affiliate advertising program designed to provide a means for sites to earn advertising fees by advertising and linking to Amazon.com.
Please respect my work, recipes and photographs. If you do use a recipe in your own writing, please give proper credit and link back to the original post.