Etched Glass {enjoy} Trifle Bowl
This post may contain Amazon or other affiliate links. As an Amazon associate, I earn from qualifying purchases.
I have to share one of the many projects that I’ve been making with my new Silhouette!
Have you ever etched glass? I can’t believe how easy it is to do!!
Take a look at what I did to my trifle bowl!……Would this not make a cute wedding or birthday gift? Think of all the possibilities!
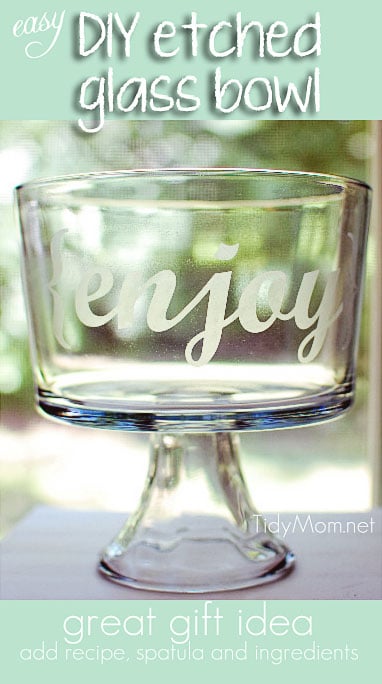
By adding {enjoy} to it makes this the perfect bowl for any dessert, like Angle Food Patriotic Delight or Chocolate Oreo Peanut Butter Dessert.
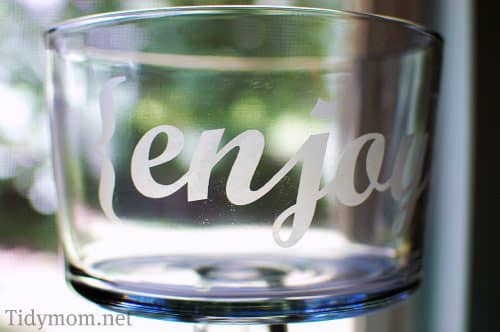
I have to say though……..a glass bowl is SO hard to photograph!……I must have taken 25+ pictures before I realized it showed up the best in front of the window. Still not the BEST shot….does any one know how to shoot something like this?
Want to see how I made it?!
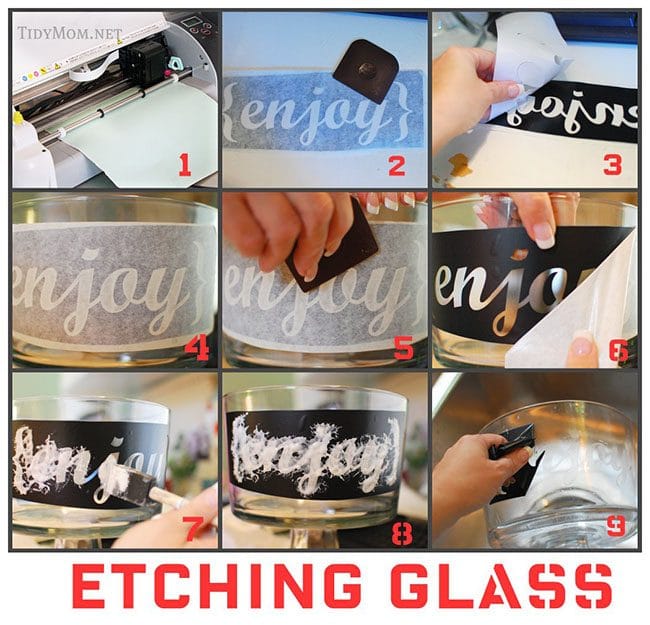
- Use your spiffy Silhouette Craft Cutter to cut what you want etched on the glass on adhesive vinyl.
- remove the letters from the vinyl and place a piece of adhesive paper to the front of your vinyl stencil and rub firmly (I used my Pampered Chef scraper)
- turn your vinyl over and remove the backing from the vinyl (leaving vinyl attached to the adhesive paper)
- place the vinyl on your bowl
- rub the adhesive paper firmly, allowing the vinyl to attach to the trifle bowl. Be sure to rub out any bubbles or creases.
- removed adhesive backing
- apply a thick layer of etching cream with a sponge according to package instructions (I purchased etching cream at Hobby Lobby, or you can find it on Amazon)
- Leave the etching cream sit for about 15 mins.
- Rinse off cream really well and remove vinyl! This makes the etching permanent, so you can not rub or wash it off. Wash bowl with soap and water, dry and it’s ready to use!
So easy right?!
You could do this for a wedding or shower gift using a trifle bowl or even a Pyrex dish, just etch the couple’s new last name! Add some hot pads and your favorite recipe and you have the perfect unique gift!
I will share a few more easy Silhouette projects in the next few days!
You may also enjoy the etched glass flower vase I made

Tidymom is a participant in the amazon services llc associates program, an affiliate advertising program designed to provide a means for sites to earn advertising fees by advertising and linking to Amazon.com.
Please respect my work, recipes and photographs. If you do use a recipe in your own writing, please give proper credit and link back to the original post.


The 15 minutes is the key! I tried this before Christmas and left the cream on for 5 minutes according to the directions and had to redo it. Good thing you included that in your tute.
The 15 minutes is the key! I tried this before Christmas and left the cream on for 5 minutes according to the directions and had to redo it. Good thing you included that in your tute.
Now that I've figured out that you don't put everything on one comment (I'm new at the contest game), here's my separate comment with the blog post:
http://stuffnplunder.blogspot.com/2010/08/because-i-need-another-toy.html
Maybe we can use my 1st comment as the "What I Do With this Silhouette" entry, hmmm?
how adorable. this makes me want to go out and buy a Silhouette.
Pingback: Tidymom
This is the best etching tutorial I have seen. Thank you so much for posting! I cant wait to test it out. You made me a new follower of Tidy Mom 🙂
I so LOVE this! Would you mind sharing which font you used? Thanks!
Very cute idea, love it on the trifle bowl! I am now following Tidy Mom, Im just getting started at the whole blog thing, if you would be so kind to follow back, I would really appreciate it 🙂
Blessings~Vanessa
Where do you get the adhesive paper? I’m wondering if I could just use wax or parchment paper…. hmmm. Great post!
Adhesive vinyl is best so it doesn’t move around on the glass while you apply and wipe the etching cream.
You can buy it at any craft store where they sell supplies for the craft cutters, like the Silhouette and Cricket
Try a dark coloured backdrop. I don’t do photography, but imagine something like a chalkboard would make the etching stand out and still show the light through the glass.
I love this idea! I’ll have to give it a try.
Adventures of a Homeschool Mom
Hello, new follower here! I would love to have you link up with my Clever Chicks Blog Hop this week!
I hope to see you there!
Cheers!
Kathy
The Chicken Chick
I am loving this idea!!!!!
What a beautiful idea! I really wish I had a silhouette sometimes. There are so many fun projects to try out. 😉
Megan
Great tutorial…will be trying this for gifts next year! I’ve seen dark tissue paper put inside for pictures…just a suggestion.
Very cool. And relatively easy!
I have a Silhoutte cutter and I also etch. This is a great idea. I have done several personalized wedding gifts and even made my daughter a baby shower vase with her shower date and etched the shower theme on it. I know a friend who would love this!!
Love this tutorial just wondering do I have to use regular vinyl or the etching vinyl
Filling your bowl with a food or liquid of a contrasting color will make your etching pop. You may try a chocolate pudding 🙂
What a great idea! I’ve never etched anything before but have always wanted to. Thanks for the info! Maybe I can make some personalized Christmas gifts.