Candy Cane Kiss Cookies
This post may contain Amazon or other affiliate links. As an Amazon associate, I earn from qualifying purchases.


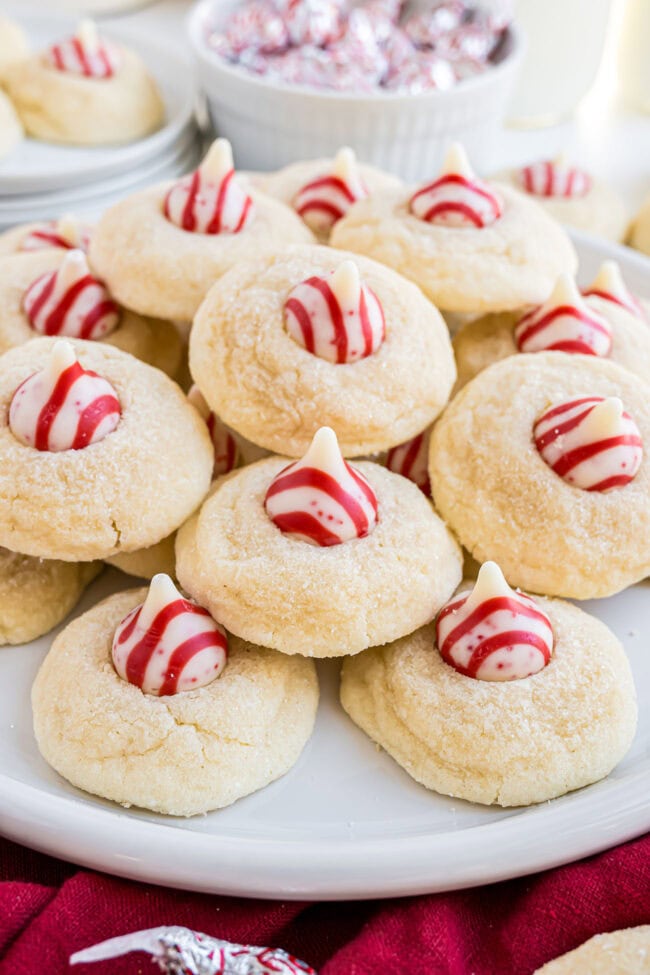
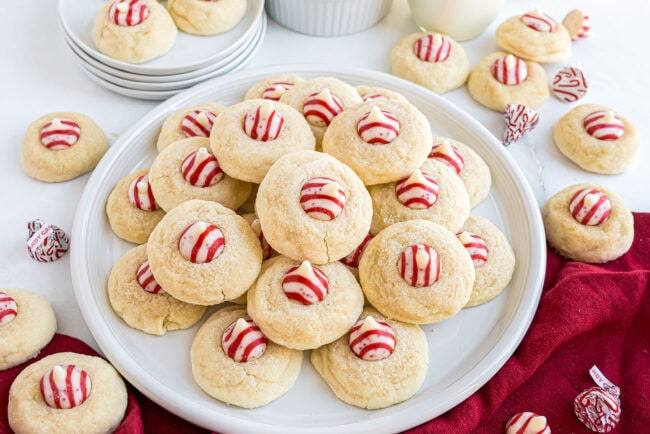
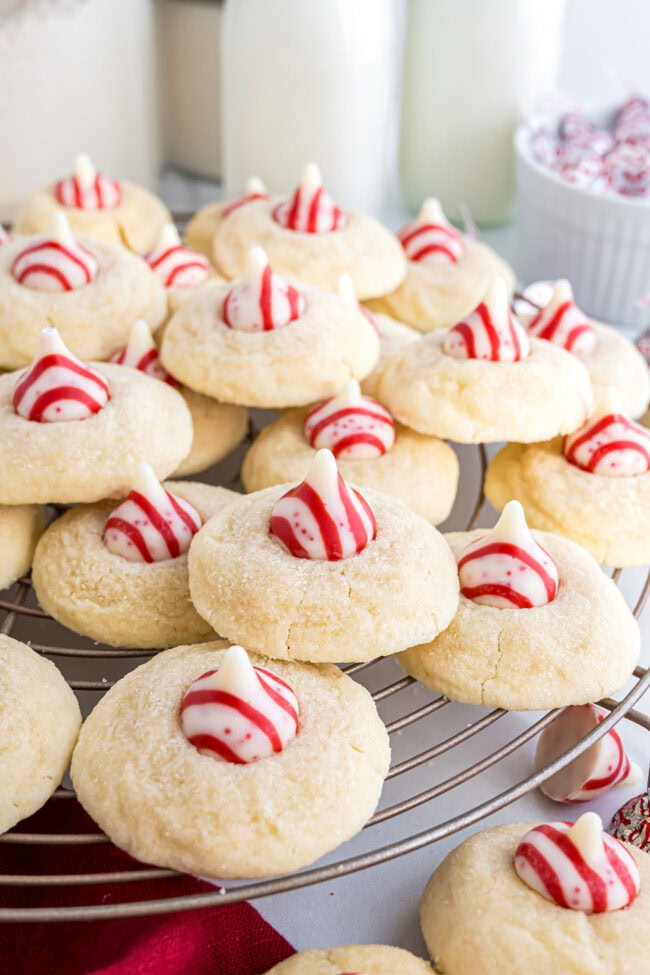
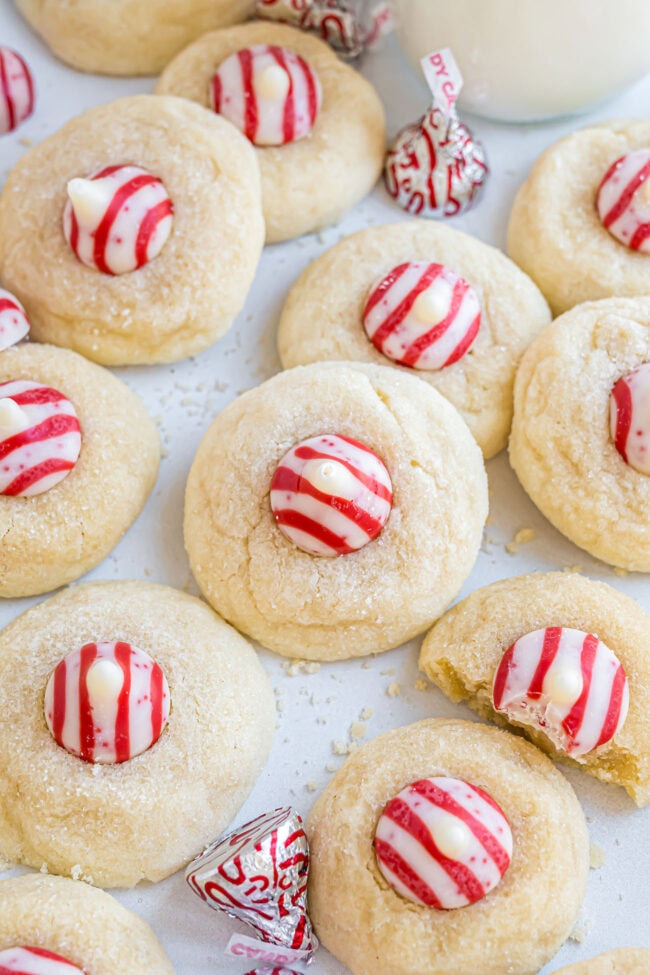
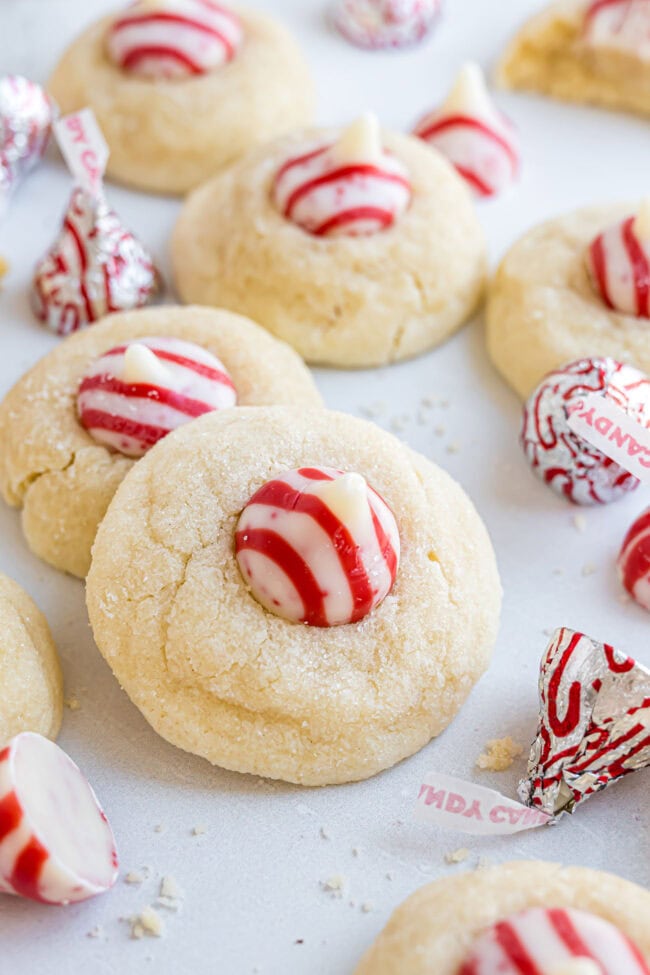
These soft, buttery Candy Cane Kiss Cookies, also called peppermint blossom cookies, are a festive holiday favorite. Each cookie is rolled in sugar, baked until just set, and topped with a pretty peppermint-striped Kiss that melts slightly into the warm cookie. They’re cheerful, simple, and perfect for cookie trays, parties, and holiday gifting….peppermint season never tasted so good.
These peppermint blossom cookies pair perfectly with my Chocolate Peppermint Kiss Cookies.
Why You’ll Love Candy Cane Kiss Cookies
- Soft vanilla peppermint cookies with the perfect holiday crunch
- No chilling required
- Made with festive candy cane Hershey’s Kisses
- Great for gifting, cookie trays, and parties
- Easy, reliable, and always a crowd favorite
These peppermint Christmas cookies are always a hit for holiday parties and cookie exchanges.
The History Behind Peppermint Blossom Cookies
Candy Cane Kiss Cookies are a festive twist on the classic peanut butter blossom. When Hershey’s introduced their holiday candy cane Kisses, bakers began swapping them into sugar-cookie dough, creating a modern Christmas cookie that now appears on dessert trays everywhere.
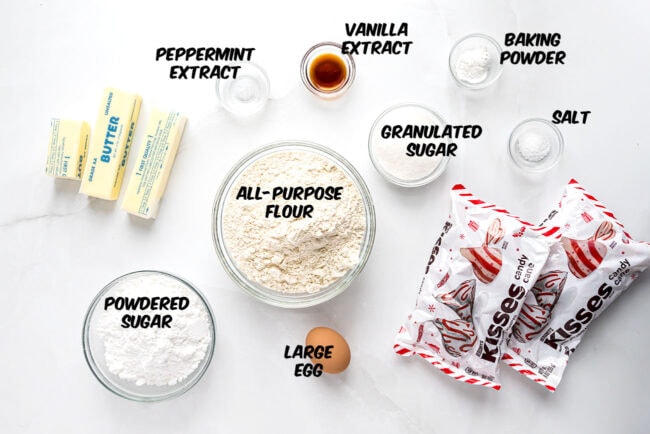
Ingredients You’ll Need
For specific amounts, please refer to the printable recipe card at the bottom of the post.
- Unsalted butter at room temperature
- Powdered sugar for a tender, melt-in-your-mouth cookie
- Egg for structure
- Vanilla extract for classic flavor
- Peppermint extract
- All-purpose flour for the cookie base
- Baking powder and salt for lift and balance
- Granulated sugar for rolling
- Peppermint Candy Cane Hershey’s Kisses for the festive topper
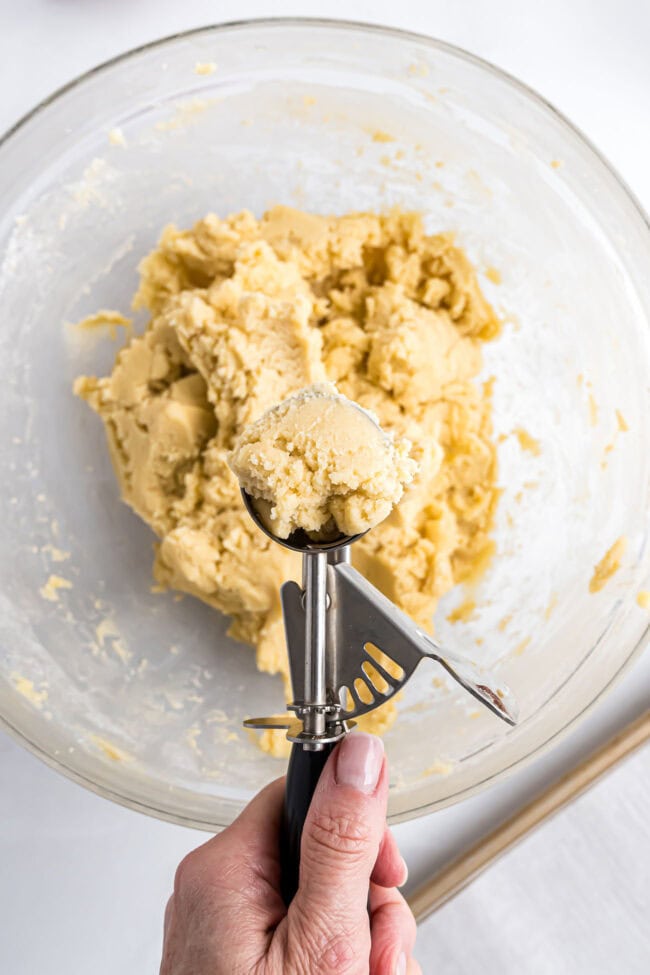

How to Make Candy Cane Kiss Cookies
When you are making this recipe, you’ll want to use the full recipe at the bottom of the page.
- Beat butter, powdered sugar, extracts, and egg until creamy.
- Whisk dry ingredients separately.
- Add the dry mixture to the wet ingredients and mix until soft and crumbly.
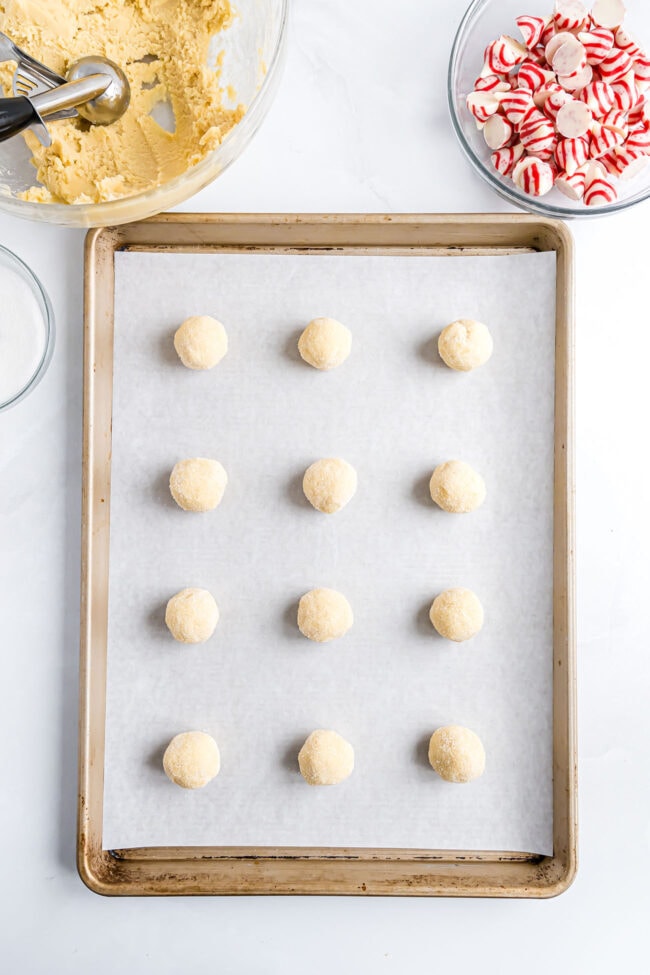
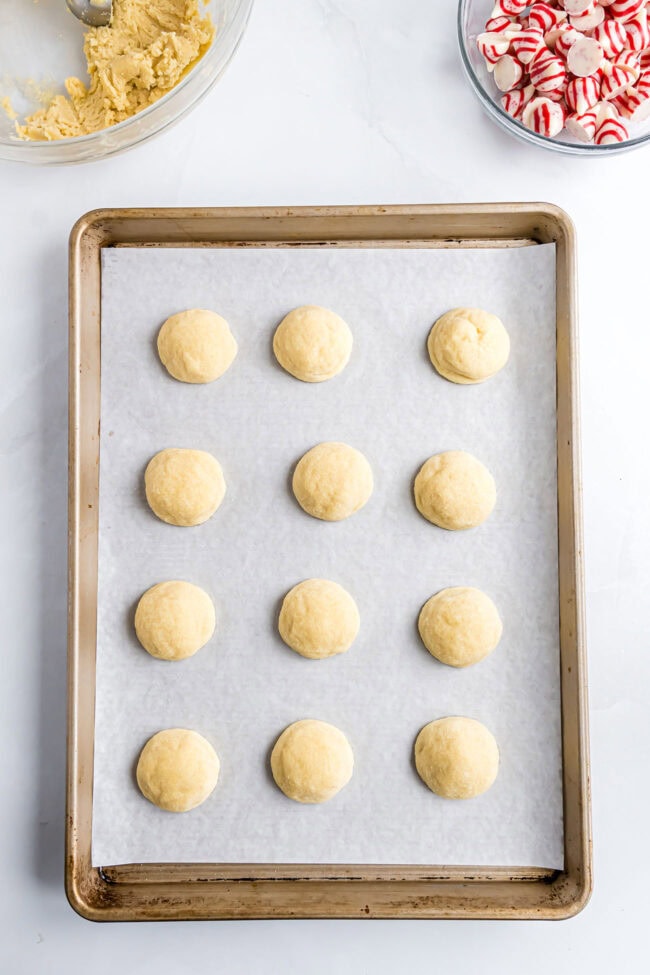
- Scoop dough into balls, roll in sugar, and gently flatten.
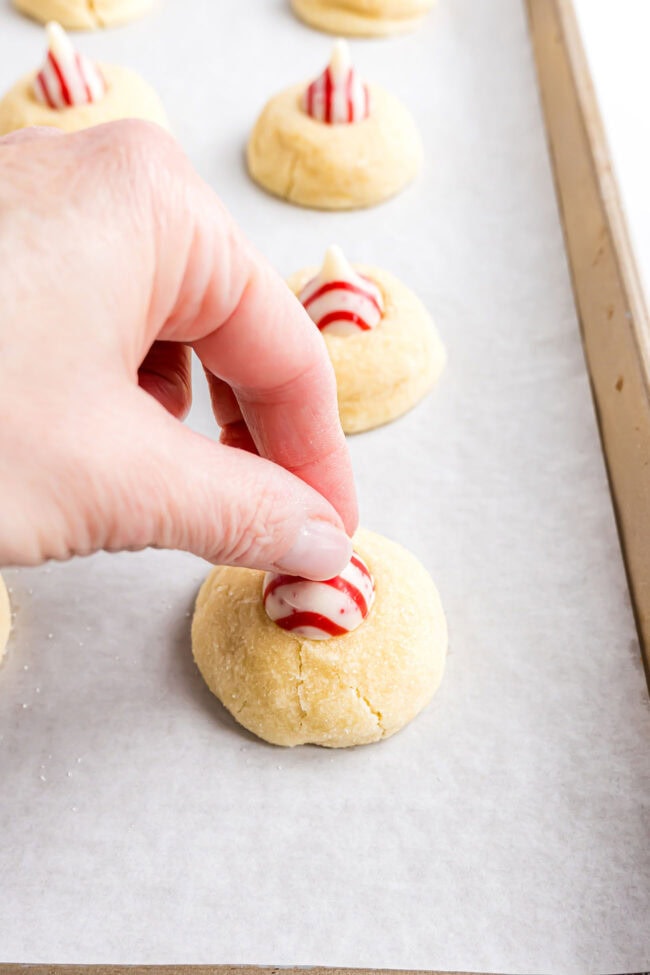
- Bake, then press a candy cane Kiss into each warm cookie.
Rolling in sugar makes these cookies sparkle like Christmas morning—don’t skip it!
Tips for Perfect Peppermint Blossom Cookies
- Slight cracks around the edges are normal and give the cookies their classic blossom look.
- If you love soft holiday cookies, try our Lemon Ricotta Cookies next.
- Chill dough for a few minutes if it feels sticky before rolling.
- Bake cookies on the middle rack, one sheet at a time, for even baking.
- Holiday sanding sugar creates extra sparkle on the cookie tray.
- Keep the Kisses in the freezer until the moment you place them on the cookies (only needed if you’re having trouble with the kisses losing their iconic shape.
How to Store Candy Cane Kiss Cookies
- Bake cookies on the middle rack, one sheet at a time, for even baking.
- Let cookies cool completely before storing. Place in an airtight container and refrigerate for up to 5 days. Bring to room temperature before serving
How to Freeze Candy Cane Kiss Cookies
You can freeze the dough or the finished cookies:
Freezing Dough
- Roll dough into balls and freeze in a zip-top bag for up to 6 months. Bake directly from frozen and add 2–3 extra minutes.
Freezing Baked Cookies
- Cool cookies fully, place in an airtight container, and freeze for up to 3 months. Thaw at room temperature for 2–3 hours before serving.

Candy Cane Kiss Cookies FAQs
They soften quickly. Freezing them ahead of time helps them keep their shape.
Slight cracking is normal for blossom cookies when the warm dough is pressed with a Kiss.
Yes—there’s plenty of peppermint flavor from the Kisses alone.
Absolutely. Refrigerate for up to 3 days or freeze for longer storage.
More Christmas Cookies to Try
- Chocolate Peppermint Kiss Cookies
- Lemon Ricotta Cookies
- Frosted Sugar Cookies
- Christmas Blondies
- Easy Drop Sugar Cookies
If you’re baking your way through the holidays, these Candy Cane Kiss Cookies belong in your rotation. They’re festive, buttery, and guaranteed to disappear fast—so make a double batch and spread a little peppermint cheer. Happy holiday baking, friends!

Candy Cane Kiss Cookies
Soft, buttery Candy Cane Kiss Cookies topped with peppermint Hershey’s Kisses. A festive, easy holiday cookie perfect for gifting and cookie trays.
Ingredients
- 1 ½ cups powdered sugar
- 1 ¼ cups (2 ½ sticks) unsalted butter (room temperature)
- 1 large egg
- 1 teaspoon pure vanilla extract
- 3 cups of all purpose flour
- 1 teaspoon baking powder
- 1/2 teaspoon salt
- 2 bags of peppermint candy cane Hershey's kisses
- 1 teaspoon peppermint extract (optional)
- 1/3 cup granulated sugar for rolling (optional)
Instructions
- Preheat oven to 350° F. Line a sheet pan with parchment paper and remove wrappers from Hershey’s Candy Cane Kisses and set aside in the refrigerator or freezer to help keep their shape.
- Using a medium mixing bowl, beat together butter, powdered sugar, extracts and egg well, scraping the bowl often until well combined (2-3 minutes).
- In a separate bowl, whisk together baking powder, flour, and salt.
- Using an electric mixer, slowly add flour mixture to the butter mixture and beat on medium speed until well blended and slightly crumbly (1-2 minutes).
- Shape dough into 1-inch dough balls (I like to use a small 1” cookie scoop) and roll the cookie balls in granulated sugar and place them on prepared baking sheet 1-2 inches apart. Use your fingers to slightly flatten the cookie dough balls before baking
- Bake cookies for 8 to 10 minutes or until set. Remove cookies from oven and allow cookies to cool 2 minutes before pressing a peppermint kiss into the center of each cookie; it’s normal for cookies to crack around edges some.
- Transfer cookies from pan to a cooling rack and set aside to cool completely.
Nutrition Information:
Yield: 30 Serving Size: 1Amount Per Serving: Calories: 125Total Fat: 1gSaturated Fat: 0gUnsaturated Fat: 0gCholesterol: 7mgSodium: 60mgCarbohydrates: 26gFiber: 1gSugar: 7gProtein: 3g
Nutrition information is estimated based on the ingredients and cooking instructions as described in each recipe and is intended to be used for informational purposes only. Please note that nutrition details may vary based on methods of preparation, origin, and freshness of ingredients used and are just estimates. We encourage, especially if these numbers are important to you, to calculate these on your own for most accurate results.


Hi there, I'm Cheryl!
As a wife, mom, and caffeine enthusiast, my journey has taken me from bustling mornings with my family to sharing delicious recipes, home care tips, and heartfelt decorating insights with wonderful readers like you. My love for baking, photography, and tidiness shines through every post I craft. Dive into my world and discover the art of homemaking, one tidy moment at a time. Read more...
Tidymom is a participant in the amazon services llc associates program, an affiliate advertising program designed to provide a means for sites to earn advertising fees by advertising and linking to Amazon.com.
Please respect my work, recipes and photographs. If you do use a recipe in your own writing, please give proper credit and link back to the original post.