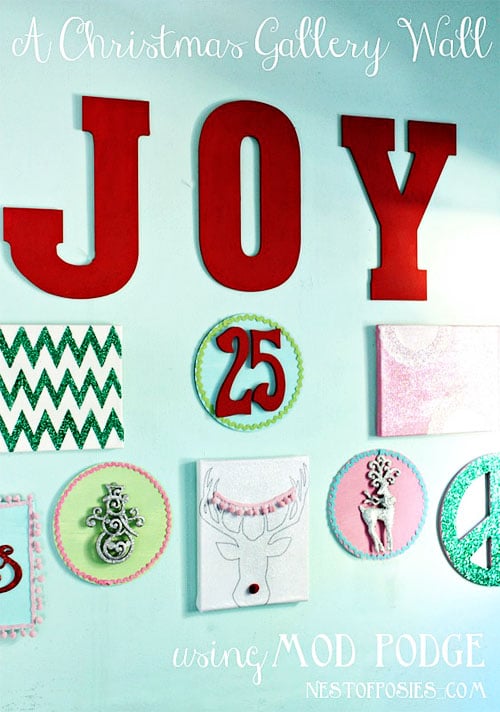
A Christmas Gallery Wall
This post may contain Amazon or other affiliate links. As an Amazon associate, I earn from qualifying purchases.
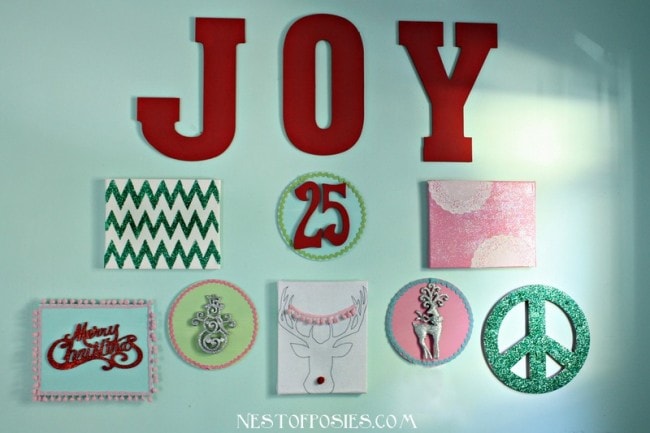
Deck your walls this holiday season! Create a Christmas Gallery Wall that’s not only easy to make, thanks to Mod Podge, but it wont break the bank either!
Hello TidyMom fans! I’m Kellie from Nest of Posies back again to share some fun seasonal craft ideas for you to do in your home! Have you started Decking your Halls? To be honest, I couldn’t wait to get started. My house was a complete mess this weekend with boxes of Christmas everywhere, craft projects underway & lots of leftover eating! But that’s what makes it all fun, is the process of it all.
I’ve partnered with Mod Podge to create this Christmas Gallery Wall & I couldn’t believe how easy & cost friendly this entire project ended up being. I am a huge fan of Mod Podge! With your imagination there’s endless possibilities big or small!
Mod Podge sent me a lovely box of products below to help create the entire wall, but outside of these products the entire cost for my Gallery Wall was around $20 dollars. I’m a big believer in creating crafts or decor items that I’ll use over & over in my home. So a small investment of $20 was worth it to me to be able to put up a Christmas Gallery Wall for years to come!
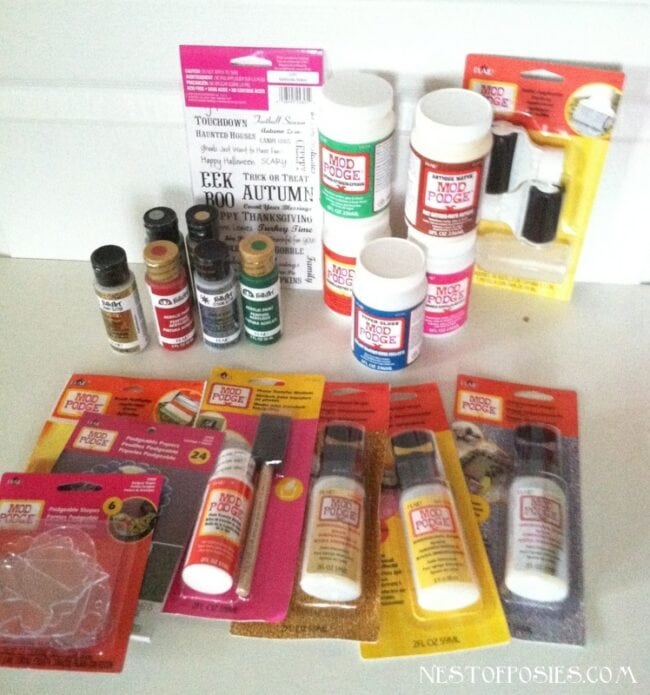
You can do so many things with Mod Podge! But over the holidays many people use it as a glue factor for all the glorious fabulous glitter effects you can do on so many items!
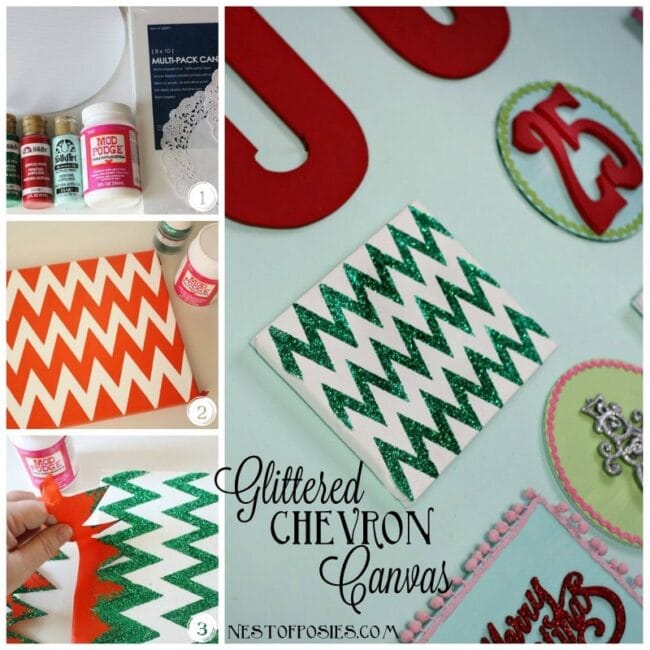
How to make Glittered Chevron Canvas:
1. The first picture was my basic supplies I used for this wall. Blank canvases, doilies, Folk Art Paint & round cardboard circles that are actually cardboard cake rounds that you can purchase in packs of 3 in many sizes! They’re cheap & paint friendly & somewhat resemble a dish when hung on a wall. My Mod Podge of choice for my Gallery Wall was the Sparkle Mod Podge ~ oh the possibilities!
2. I did use my Silhouette machine to cut a stencil for my chevron & I applied the Mod Podge Sparkle to all the exposed areas.
3. Sprinkle glitter over the Mod Podge area (don’t forget to place cardboard or an empty box underneath to catch all the glitter!) Shake off the excess glitter & carefully remove the stencil & allow to dry overnight! Yep, it’s that easy! I also used the same method of applying Mod Podge & glitter to the PEACE sign hanging in my Gallery Wall.
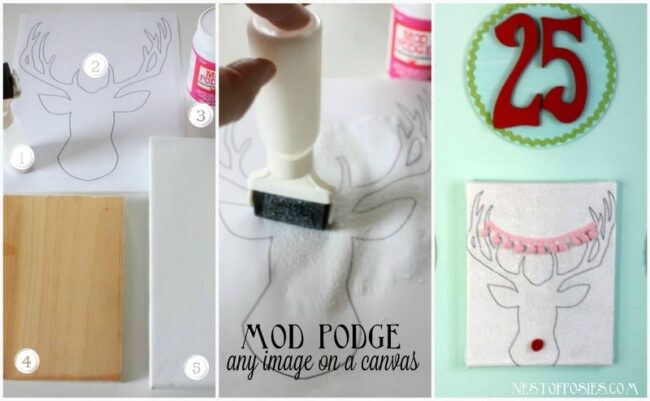
Have you ever used Mod Podge to transfer an image to a canvas before? It’s easy as can be!
How to transfer an image to canvas:
1. Use the rolling sponge applicator filled with Mod Podge.
2. Use any image – just print it out on a regular sheet of photocopy paper. (click to download free reindeer image)
3. I used the Sparkle Mod Podge to make my deer have a shiny holiday effect.
4. Helpful tip: I learned that having a piece of wood to tuck behind your canvas (in the center of the canvas frame) really helps when applying Mod Podge & the wood allows you to have a harder surface so that the wrinkles will come out when applying Mod Podge.) You can see more of my canvas Mod Podge projects here. I used my wood trick for applying Mod Podge to those canvases as well.
5. First, you will want to cover your canvas in Mod Podge , and place your image directly on top of the Mod Podge. Next, apply another coat of Mod Podge with the roller sponge applicator over the image and allow to dry 24 hours. I highly recommend only one coat of Mod Podge on top of image. Just let it be & the drying process will probably fix any small wrinkles you may have.
I purchased the wooden lettering, “25” & the peace sign from my local craft store using coupons, so the cost remained really low. I applied 2 coats of Folk Art craft paint to cover all the wooden pieces along with the cardboard cake rounds & of course glitter for the peace sign using Mod Podge. The ornaments are all from the dollar bins & the trim around the frames & cake rounds are just scraps I had around the house.
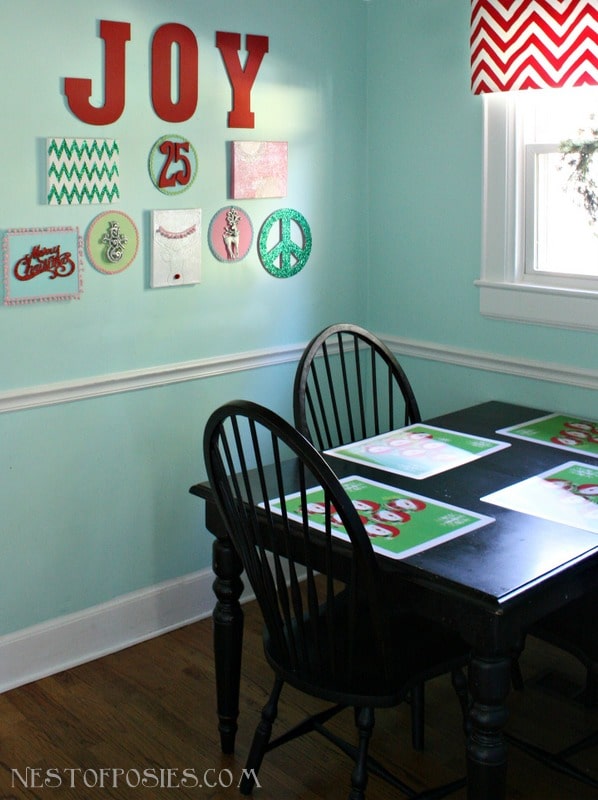
Here’s the hub of our home in all it’s Holiday decor. I have 3 young kids, so this is where everything occurs for them. Meals, crafts, painting projects – you name it! It’s one of the happiest but messiest rooms in our home. Click to see how my breakfast room looks throughout the year, or to see how I made the Chevron Curtain. Thanks for having me over & allowing me to share one of my favorite craft/decor supplies with all of you!
Happy Holidays!
Find more Mod Podge Ideas on their Facebook, Pinterest or Twitter accounts.
Check out more holiday projects with Mod Podge
Disclosure: I wrote this post as part of a paid campaign with Plaid and Blueprint Social. The opinions in this post are my own.
Tidymom is a participant in the amazon services llc associates program, an affiliate advertising program designed to provide a means for sites to earn advertising fees by advertising and linking to Amazon.com.
Please respect my work, recipes and photographs. If you do use a recipe in your own writing, please give proper credit and link back to the original post.

I love those chevrons! I don’t have a paper cutter, so I need a stencil or something. Perfect for this holiday season!
What a fun idea (and I LOVE the color of your walls!)
me too Kristen! My office is close to that color, I would love it in the rest of my house! Sure looks pretty with Christmas!
thank you Kristen! one of the best color choices i’ve made for our home! and surprisingly it goes with so many other colors!
Love this! What a great way to get in the holiday mood!
thanks Maria! it did turn out to be a happy festive wall. the kids & i love it!
How fun!
This is really impressive. Love the big *JOY* and the ornament plaques.
thank you so much, Paula!
Cute ideas! I love the deer.
the deer is my favorite too!
Those are so cute! What a fun holiday wall 🙂
Cheryl! this is so cute and crafty! I am totally inspired to get decorating today!
Now that’s a nice way to dress up your walls for the holidays!
thank you , sylvie! it was a fun project to work on!
This will take some time and efforts, but this result is just fantastic. Lovely idea Kellie.
I’m a little bit obsessed with both glitter and chevron, so clearly I need to make that canvas. What a cute idea!
such fun, Cheryl. It makes me want to unpack all of those unused scrapbooking supplies!
What a fun, fantastic holiday idea Kellie – I think even I could make these – it looks so easy!
SUPER fun idea Cheryl! I’ve got a wall that needs a little Christmas cheer.
This is so fun, easy, and festive! I got all the stuff to make my own this weekend! I hope it turns out as fab as yours. 🙂
This is terrific!! Love how easy you made it look! My daughter, the crafter in the house, is begging to do this now. 😉
Ahhh that reindeer is so cute and love the sparkly chevron.
Definitely believe that which you said. Your favorite
justification appeared to be on the net the easiest thing to be aware of.
I say to you, I definitely get irked while people consider worries that they just don’t know about. You managed to hit the nail upon the top and defined out the whole thing without having side effect , people could take a signal. Will likely be back to get more. Thanks
Very great post. I just stumbled upon your blog and wanted to mention
that I’ve really enjoyed browsing your blog posts. In any case I will be subscribing for your rss feed and I’m
hoping you write once more very soon!
Good information. Lucky me I discovered your website
by accident (stumbleupon). I have book-marked it for later!
whoah this weblog is great i really like studying your
articles. Stay up the great work! You realize, a lot of people are hunting around for this info, you can aid them greatly.
I love looking through an article that can make men
and womenn think. Also, many thanks for allowing for me to comment!