Snow Globe Photo Ornament DIY Tutorial
This post may contain Amazon or other affiliate links. As an Amazon associate, I earn from qualifying purchases.
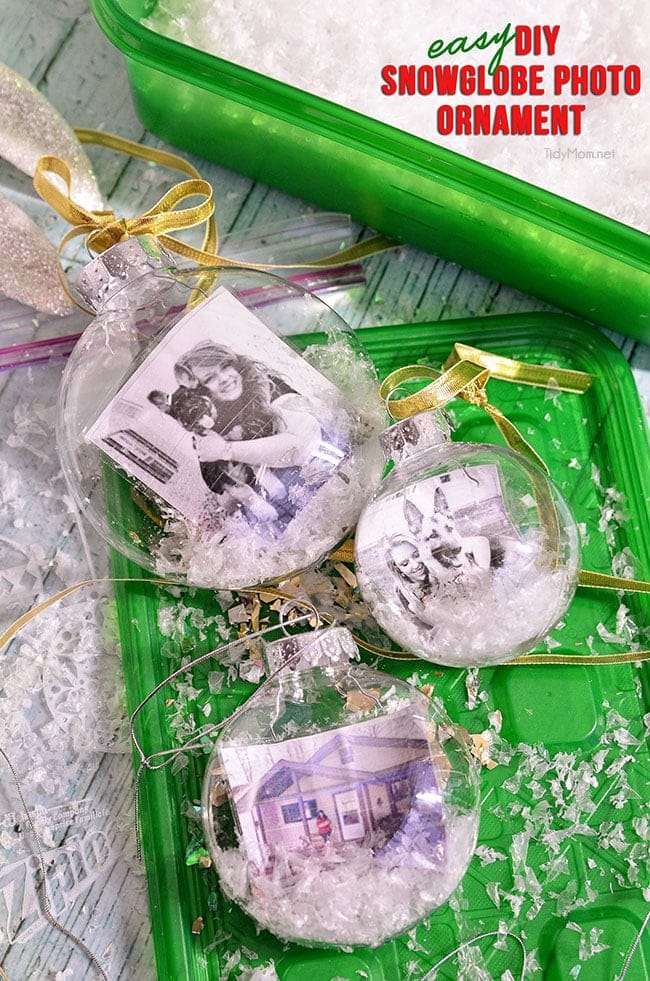
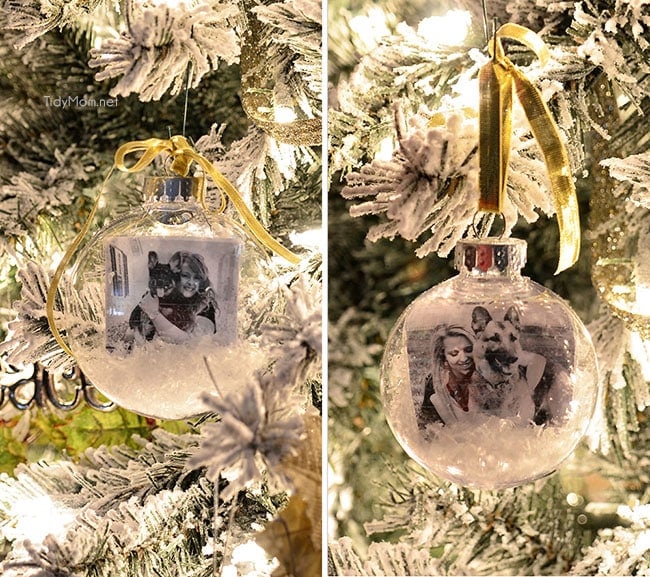
These Homemade Snow Globe Photo Ornaments are a fun easy project and will make a wonderful personalized gift, addition to any tree or tie one onto a gift for extra special gift wrapping.
This post may contain affiliate links. Please read my disclosure policy here.
I’ve noticed that the older I get, the quicker the holiday season seems to arrive. Before I know it, I’m caught up in the chaos of decorating my home, gift lists, shopping, baking cookies, family get-togethers, holiday parties decorating, watching Christmas movies, wrapping presents, and singing along to our favorite holiday tunes.
A quick holiday homemade gift can take a little stress off my “what to give” list. I just love homemade Christmas ornaments! They bring a personalized element to any Christmas tree, and they made great gifts as well!
A few years back I made 3 homemade Christmas ornaments using clear glass ball (or plastic) ornaments. They are so fun to fill and decorate, the possibilities are endless.
This year I wanted to make some homemade ornaments with photos. Our oldest daughter, Heather bought her first home back in March, and I thought the picture of her holding the “sold” sign in front of the house would be a fun little keepsake ornament for her first tree in her own home!
The snow globe photo ornament of her first home turned out so cute, I just had to make a few more.
I actually had everything I needed right at home.
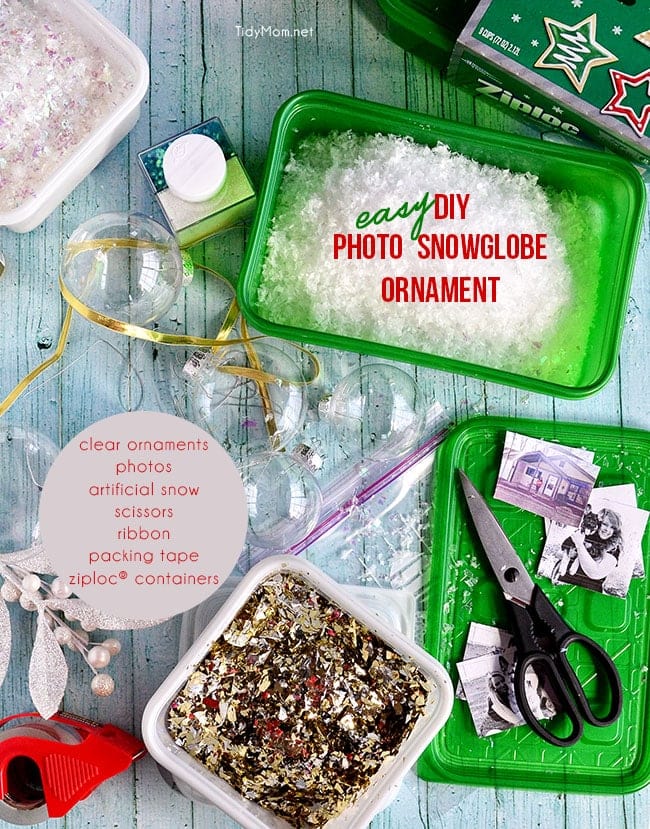
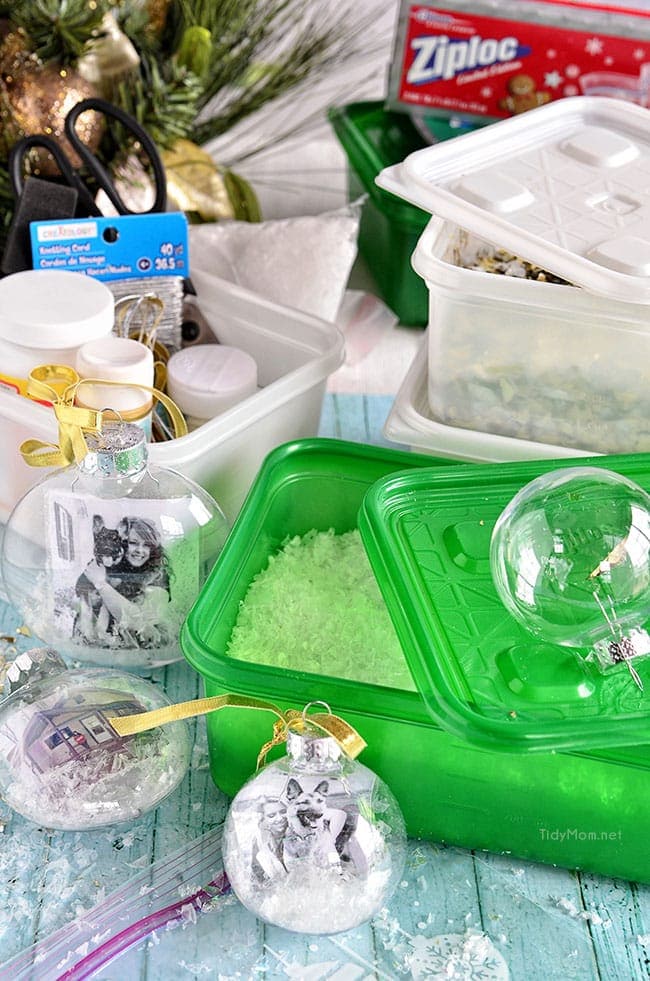
Snow Globe Photo Ornament supplies
clear plastic or shatterproof glass ornaments (I used the round balls and the flat ones)
photo – you will want 2 copies of your photo so it can be seen from both sides. I just printed these at home on copy paper. 2.5″ – 3″ wide work best for the 2 sizes of ornaments I had.
packing tape
artificial snow or glitter
scissors
ribbon
Ziploc® Holiday Container (for catching snow when filling ornament, and for storage)
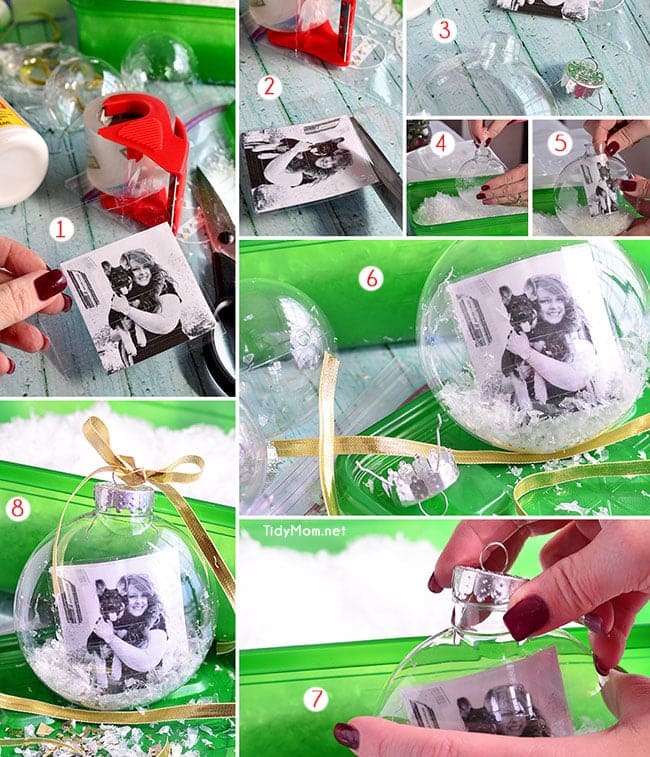
Snowglobe Photo Ornament Tutorial
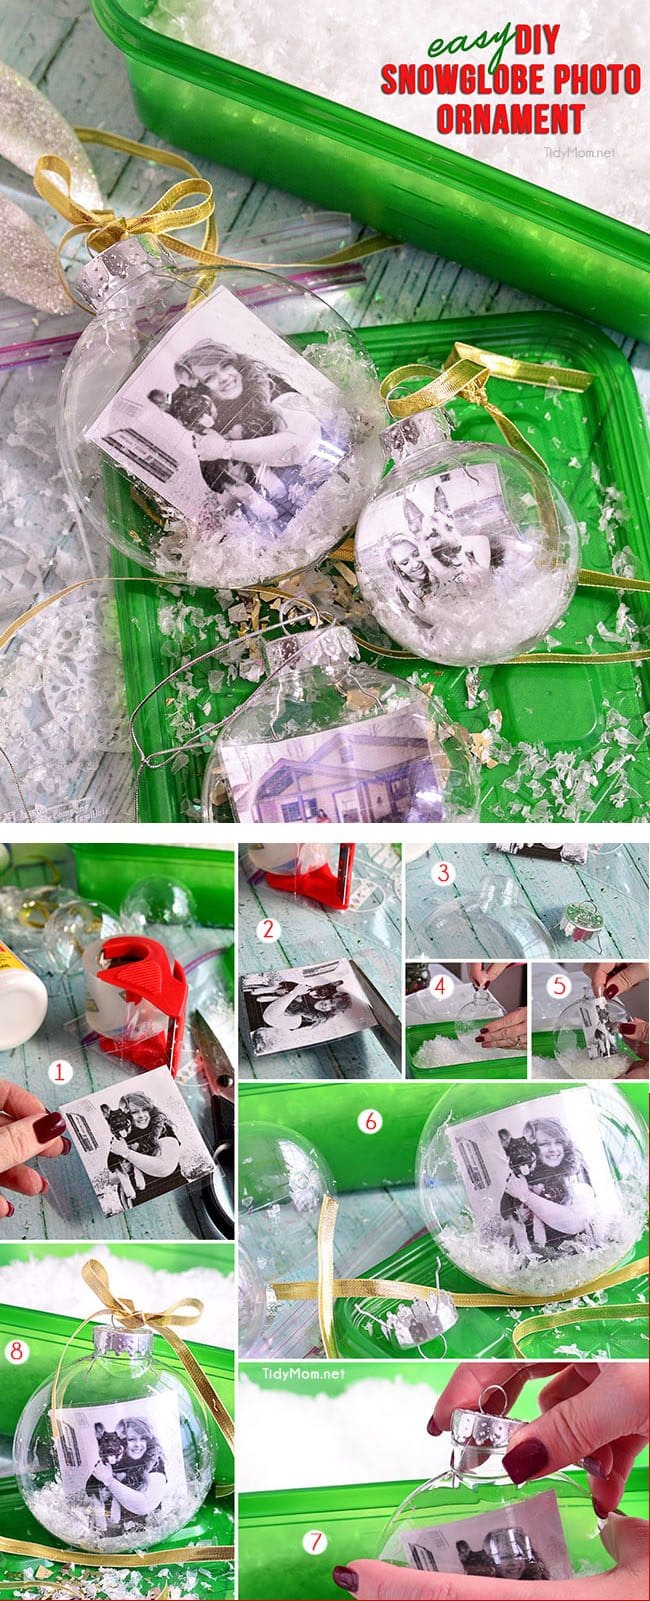
- First I resized the photo I wanted to use, to about 2.5″-3″ wide (I used photoshop, but almost any photo editing software or website or even word processing program will let you do this). I printed 2 copies on copy paper. I placed the copies with back sides together and “laminated” them with packing tape. – basically just cover the image in packing tape beyond the edges of the picture, on both sides.
- Next, I trimmed the excess tape so I had a very small edge around the picture. (note: do NOT cut all the way to the edge of the pictures. if you do, your pictures will not be laminated, going past the edge of the picture is what keeps them stuck together)
- Remove the top of the ornament, and set aside
- I filled a Ziploc® Container with my artificial snow. I held the ornament over the container and filled about 1/4 full of snow. By keeping my ornament over the Ziploc® Container I avoided the mess of getting snow all over while filling the ornament, and I had a simple way to store my snow for the next project.
- I rolled the laminated photo and dropped it into the ornament.
- I used my finger (or you could use tweezers) to open/unroll the photo.
- I placed the ornament top back on.
- Added a ribbon and it’s ready to hang on the tree!!
SO easy!! After I printed the pictures, it took me less than 10 minutes to make all 3!
The snow globe photo ornaments look beautiful on our new flocked tree.
The girls love their ornaments with their dogs.
The ornament with Heather’s new house will be a surprise I’ll give her on Christmas Eve. It would be fun to make one for each home you’ve lived in, or with an annual family Christmas photo, a class photo for a teacher, grandkids for grandparents, wedding picture for newlyweds, new baby’s, graduate……..I could go on and on.
LIKE IT? PIN IT!
The Ziploc® Holiday Collection is perfect for crafts, recipes, entertaining, gift-giving! They certainly came in super handy for keeping my mess contained while I worked, and I love that I now have a storage container for my snow and glitter. The One Press Seal allows the containers to be securely closed with one simple press on the lid and they are designed to be nested within each other when empty and stacked when full, saving valuable storage space.
Don’t you just love an easy personalized gift/craft like that? What photo would you put in an ornament?
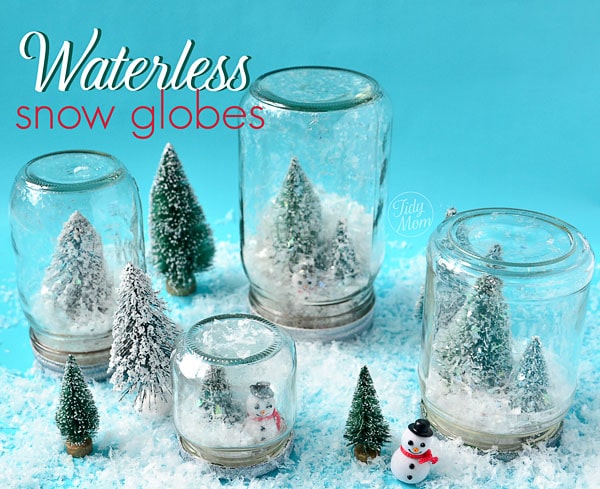
If you like this snow globe ornament craft, you might also like to make Waterless Snow Globes.
Disclaimer: I have a working relationship with Ziploc®. As always, all view and opinions, and my love for Ziploc® Containers, are all my own.
Tidymom is a participant in the amazon services llc associates program, an affiliate advertising program designed to provide a means for sites to earn advertising fees by advertising and linking to Amazon.com.
Please respect my work, recipes and photographs. If you do use a recipe in your own writing, please give proper credit and link back to the original post.



I love this idea Cheryl. Your ornaments turned out really cute. I have a flocked tree as well that we bought a few years ago and I love it. I hope you have a Merry Christmas.
I love photo ornaments – so fun to look back on them over the years. These are great. And love your photos – the colors and setup, so fun!
This is an amazing gift! A must make for family members. I hoping to make a couple of these for the grandparents.
These are so cute! Great gift idea for friends and family!
Yours turned out so cute & I can’t wait to make some of these and give them out to family and friends as Christmas gifts.. Thank you so much for the tutorial 😉
Lovely idea! This diy ornament is perfect. I have to do that. Thank you so much for the full tutorial.
These look lovely and so do some of other Christmas ornaments I have seen in different sights. Have a problem with the artificial snow, I have never seen it in Australia otherwise would love to make these. Can anyone tell me what else could be used besides glitter (don’t think that would look as good as snow- especially if doing a snow scene.)
Where can you but artificial snow in Australia….Please help
U can use tree tinsel just cutvit up in small pieces. Use tiny tiny tiny pom pims from craft store for tiny snow balls
You can also stamp Images on clear sheets. Then paint them and use the same way. I also drew designs on the outside of the globe near the top without blocking the view of the photo with glue and sprinkled with glitter. They turned out awesome!
What a lovely idea. How do you keep the photo in place so it doesn’t move around?
Cheryl they are so pretty and special! I think I need to do a couple of last minute gifts, thanks for the idea!
I just picked up half a dozen plastic orniments today, thinking I could make something nice for the boys in our Cub Scout pack. Came home and started looking for ideas. I really think your idea is just what I was looking for and the best one I’ve come across! I’m thinking of either having all the boys wear Christmas hats and either hold a gift with their names printed large on them together, as a group for gifts to the boys or doing something nice with each of the boys individually for their parents. Then again, I could also do one photo on one side of each boy with the other side a group photo. I may get busy and do both though since I know the parents just LOVE getting a photo ornaments of some sort of their Cubs at Christmas time. Last year, I got a photo of each of the boys with Santa and we made paper ornaments I laminated.
Anyway, thanks for the perfect idea.
Theses are great! I made these a couple years ago and copied the picture on transparency paper so you see the picture from both sides. Really cute too.
Thank you, this article adds to my knowledge and very helpful
Thank you for the tutorial. I had seen these several times and couldn’t get the photos to flatten or stant up. I'”” try the two sides and see if that doesn’t make a difference. I recently came into possession of a tintype of my great great grandfather. I have reproduced the photo. I used clear nail polish on the glue of the old black photo corners. When the polish was dry I added them to the ball I” hoping the nail polish will prevent humidity from making the corners sticky and ruining the photo.
Thanks for the help!
This is such a cute, easy and special gift idea, Cheryl.
I’m going to make these with my li’l Daisy!
How do you keep the photo from moving around inside the ball. Will the picture stay in place? I had been looking for a diy to make these. Thanks for sharing,
we’ve pulled these out every year for 4 years now, and the photos are still in the same position. Just don’t make the photo too small and you should be good.
Can you add liquid to this so when you shake it, snow will drift instead of falling quickly?