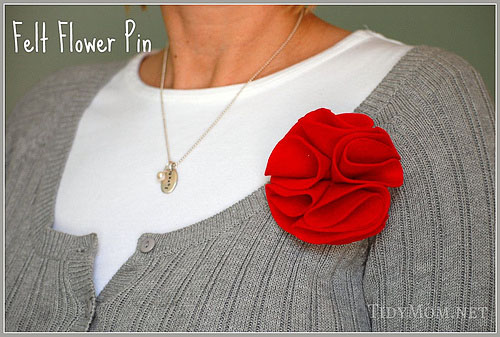
How to: Felt {Valentine}Rosette Flower Pin
This post may contain Amazon or other affiliate links. As an Amazon associate, I earn from qualifying purchases.
After seeing some of the wonderful felt heart wreaths around in blog world, like Amy’s and Robin’s………I started thinking, maybe I could make a pin, using the same concept.

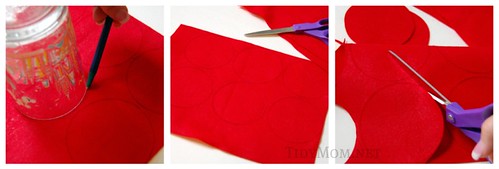
I started with a 9×12 piece of red felt that I bought at Michaels. Grabbed a glass that was about 3″ in diameter, and traced 6 circles on my piece of felt, then cut them out.
(you also click the picture and choose to view in a larger size for detail)
- Take one circle, fold it in half,
- then in half again.
- Hand stitch thru the bottom point enough to keep it folded.
- Then do the same with each of the circles. I just went from one to the next pulling my thread tightly to keep them all together(I just placed them randomly around each other, not in a stack…it will make sense when you’re making it, you basically want the tips sewn together). When I had all 6 pieces attached I put a few more stitches in to keep them nice and tight together.
- Next sew them onto a little pin backing (you can these at Michaels in the jewelry making section).
// ]]>

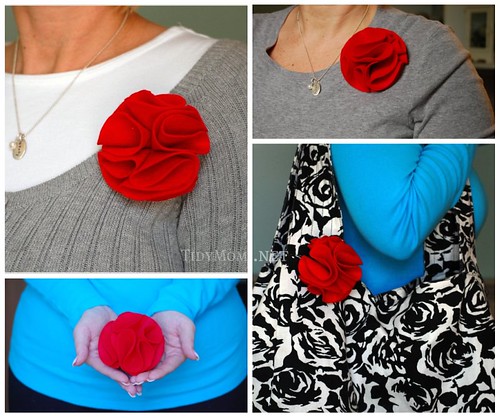
These were so easy and I love how they turned out! The red makes them perfect for Valentine’s Day!
You can wear them on a sweater or jacket, t-shirt, on a bag……or give as a gift!
You could even use them as embellishments on scarves, hats, or pillows – oh, you get the picture!……just sew them right on instead of pining them on!
***********************************
My talented friend Amy of Living Locurto is featuring another meal plan by me this week!!
Click here to see my meal plan for this week,
she makes it SO easy by putting my meal plan in a pdf file…..she even has a shopping list made up for each meal!
I’m linking this project post up at the following blog parties:
Metamorphosis Monday, Make it for Monday, Make it Mondays, Making the World Cuter, Just Something I whipped Up, Motivate Me Monday, Make Your Monday, Thrifty Decor Chick, Hoosier Homemade Valentine Party, It’s so very Creative, DIY Day, Today’s Creative Blog, Talented Tuesday, Tut Yourself Tuesday

// ]]>
Tidymom is a participant in the amazon services llc associates program, an affiliate advertising program designed to provide a means for sites to earn advertising fees by advertising and linking to Amazon.com.
Please respect my work, recipes and photographs. If you do use a recipe in your own writing, please give proper credit and link back to the original post.


This is just lovely! What a wonderful way to make a plain old bag or sweater bright and festive. Valentine's Day is my favorite holiday- this project may have to go on my to-do list.
This is just lovely! What a wonderful way to make a plain old bag or sweater bright and festive. Valentine's Day is my favorite holiday- this project may have to go on my to-do list.
Now that is just adorable! OK…for me, the crafting idiot…did you stack all 6 pieces right on top of each other in a row and then fan them out once sewn?
Your collage how-to is so pretty!
Now that is just adorable! OK…for me, the crafting idiot…did you stack all 6 pieces right on top of each other in a row and then fan them out once sewn?
Your collage how-to is so pretty!
I love this! It seems simple enough that I could actually make it. Thanks for the tutorial!
Kaysi @ Keeing It Simple
I love this! It seems simple enough that I could actually make it. Thanks for the tutorial!
Kaysi @ Keeing It Simple
SO PRETTY! You are amazing!
SO PRETTY! You are amazing!
That is really cute! And simple!
That is really cute! And simple!
So pretty! It looks great on the black and white bag!
So pretty! It looks great on the black and white bag!
Cute pin.
Cute pin.
cheryl, this is waaay cute!! I can't wait to try it. Have you tried it with paper??? I think I will!
Lynn
cheryl, this is waaay cute!! I can't wait to try it. Have you tried it with paper??? I think I will!
Lynn
Just beautiful. I can't wait to decide what I will use these for after I make a bunch of them!
Just beautiful. I can't wait to decide what I will use these for after I make a bunch of them!
J'adore ! Tres chic my dear.
J'adore ! Tres chic my dear.
This is darling. Thanks for the clear tutorial!
This is darling. Thanks for the clear tutorial!
Wow I love it, it looks so cute and fun! I need to make one now.
Wow I love it, it looks so cute and fun! I need to make one now.
HAHA that is so hilarious. I did the wreath as well and have been making pins all day. Brilliant minds think alike.
HAHA that is so hilarious. I did the wreath as well and have been making pins all day. Brilliant minds think alike.
Just precious! I love it!
Just precious! I love it!
What a clever twist! I love the pop of color it adds. Thanks for the link and all of the support for my blog!
What a clever twist! I love the pop of color it adds. Thanks for the link and all of the support for my blog!
I saw this post in my email yesterday! They are adorable! I'm so glad you added them to my Valentine Party!
~Liz
I saw this post in my email yesterday! They are adorable! I'm so glad you added them to my Valentine Party!
~Liz
Thank you for sharing!! I have some red felt and I can't wait to try this for my girls and myself! Great idea-love it!
Thank you for sharing!! I have some red felt and I can't wait to try this for my girls and myself! Great idea-love it!
Super cute idea!
Please feel free to stop by the Talented Tuesday at My Frugal Family link party, and add your weekly craft links!
It's found at theherberfamily.blogspot.com
Super cute idea!
Please feel free to stop by the Talented Tuesday at My Frugal Family link party, and add your weekly craft links!
It's found at theherberfamily.blogspot.com
Love it! I think I like it on the black and white bag best. Thanks for sharing!
Love it! I think I like it on the black and white bag best. Thanks for sharing!
Adorable! I want some. Oh, the ways I could use this…..
Adorable! I want some. Oh, the ways I could use this…..
This is a great idea and I like your thinking of taking one thing and turning it into another using the same concept! Very clever. I will try it too. Thanks for sharing. Very good tutorial with all your pictures too.
This is a great idea and I like your thinking of taking one thing and turning it into another using the same concept! Very clever. I will try it too. Thanks for sharing. Very good tutorial with all your pictures too.
Thank you for sharing this…I want to make one for a hat!
Cindy at Lakewood
Thank you for sharing this…I want to make one for a hat!
Cindy at Lakewood
PRETTY PRETTY!! 🙂 Thanks!
PRETTY PRETTY!! 🙂 Thanks!
I love this and you make it look doable!
xoxo
Robin
I love this and you make it look doable!
xoxo
Robin
Very pretty. I like its simple elegance.
Very pretty. I like its simple elegance.