Elegant Succulent Pumpkin Planter
This post may contain Amazon or other affiliate links. As an Amazon associate, I earn from qualifying purchases.
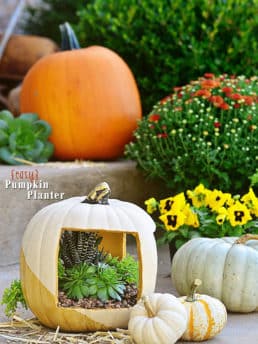
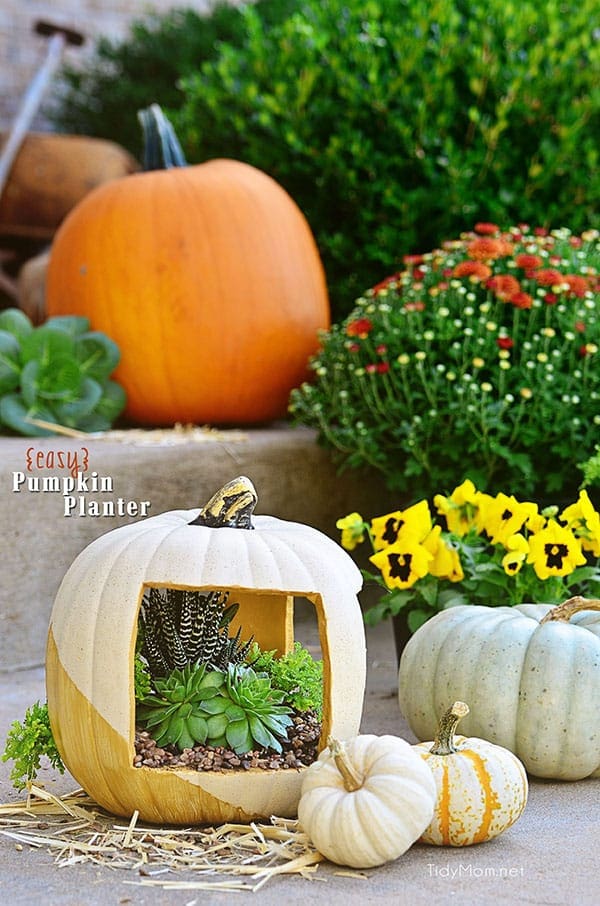
Add a bit of elegance to a faux white pumpkin with succulents, a few basic craft supplies and a little imagination for this easy DIY Elegant Succulent Pumpkin Planter. Scroll down for the full tutorial.
Click HERE to save this tutorial to Pinterest!
Have you seen the latest trend turning pumpkins into planters? It’s a great way to make those pumpkins a little functional as well as pretty. A succulent pumpkin planter can add interest and a little green life to a fall display or centerpiece.
Succulents are so pretty this time of year. They are very forgiving and hardy, meaning they can withstand a great deal of neglect and still keep on growing– my kind of plant! This year I’m trying a little softer look for fall, by using neutrals more than bright orange, so I used a white faux pumpkin for this little project. When I added a bit of gold paint, it made it oh so elegant, while the pumpkin gives a subtle nod to fall. You don’t need many supplies, many you probably already have on hand.
Supplies List To Make a DIY Pumpkin Planter
- faux craft pumpkin
- a hot knife (found at most craft supply stores near the wood-burning supplies)
- sandpaper
- gold acrylic craft paint
- painters tape
- sponge brush
- potting soil, succulents, and pebbles

How To Make a Pumpkin Planter
First, you want to cut 3 square holes in your pumpkin. You could probably use a pumpkin carving knife, but my hot knife made it super easy. it’s basically a utility knife that has a heated blade. You can pick one up at Michaels for $10 if you use a 40% off coupon.
I just eyeballed where I wanted the openings. Just remember you need enough room in the bottom to hold the soil and plants.
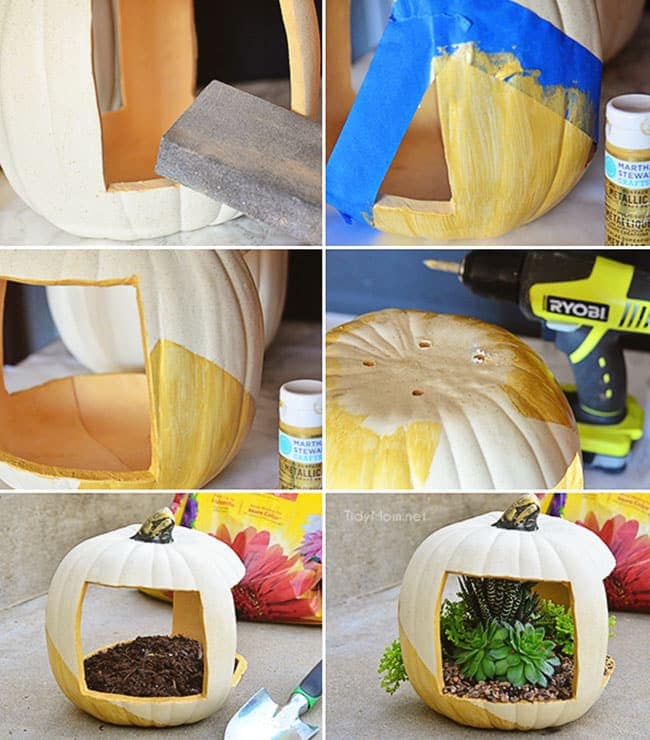
Next, I sanded the openings a little just too smooth the edges some. I then used painters tape to mark off where I wanted to add a little gold to my pumpkin.
I used a few coats of Martha Stewart Metallic Gold to paint the areas I tapped off and the inside edge of the openings and stem, to give it a more finished look.
I removed the tape, and let the paint dry.
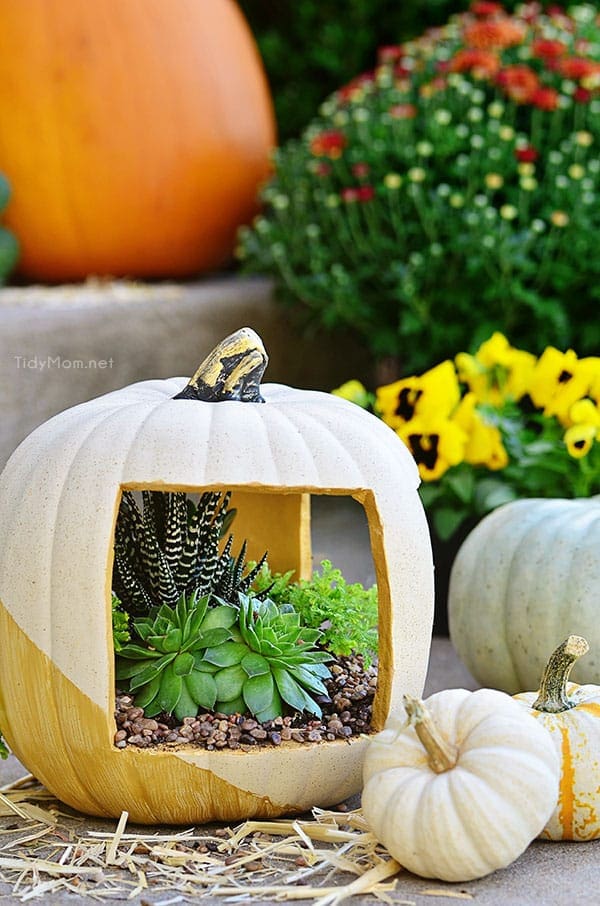
After everything was dry, which only took about 5-10 minutes, I turned the pumpkin over and drilled a few drainage holes in the bottom (you could also do this before you paint). I then filled the bottom of the pumpkin with soil and planted the succulents. I filled in with some pebbles I had, which also gave it some added interest. And that’s it!
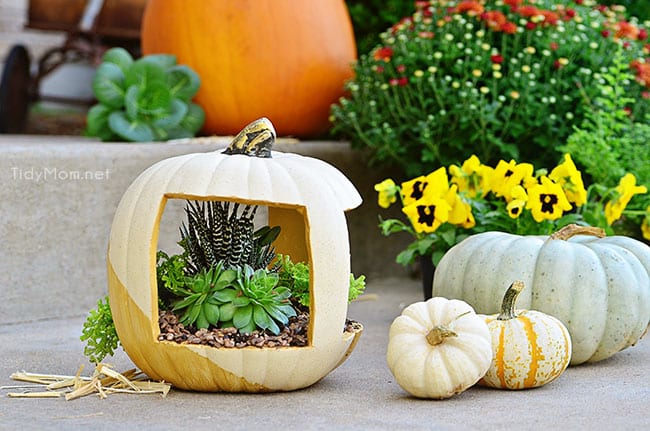
It looked great out front with some other pumpkins and mums.
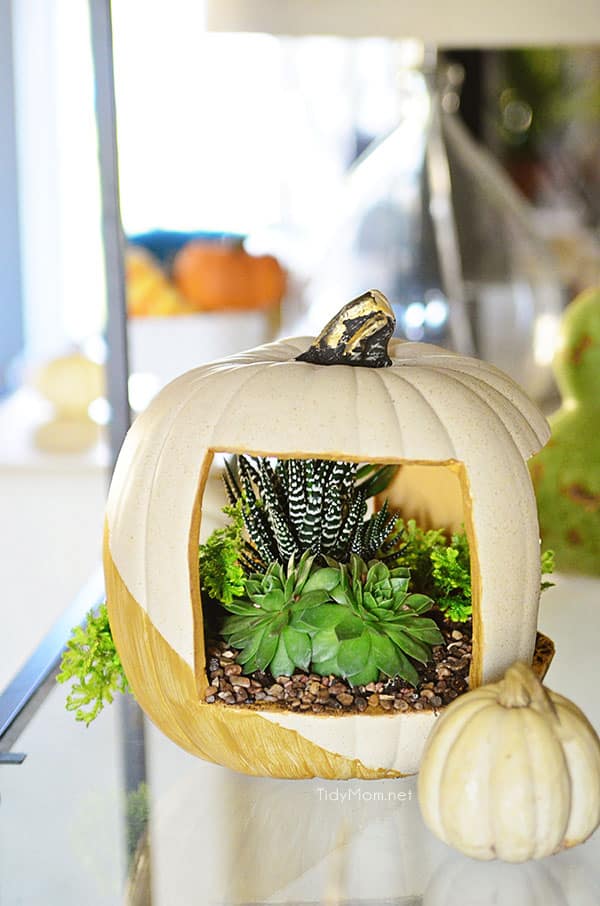
Or inside on my bookcase.
Since I used a faux pumpkin, this will easily last thru Thanksgiving, then I can just transplant the succulents to another container until next year.
I took Clinton Kelly’s (from The Chew) 30-minute pumpkin challenge to make this Elegant Succulent Pumpkin Planter. You can see more fabulous 30-minute pumpkin ideas and take the challenge yourself over at ClintonKelly.com
Be sure to follow the hashtags #30minpumpkin and #pumpkinchallenge on twitter and Instagram – or better yet, use them to show off your 30 minute pumpkin ideas!! I’d love to see what you come up with.
More Easy Fall/Halloween Ideas:
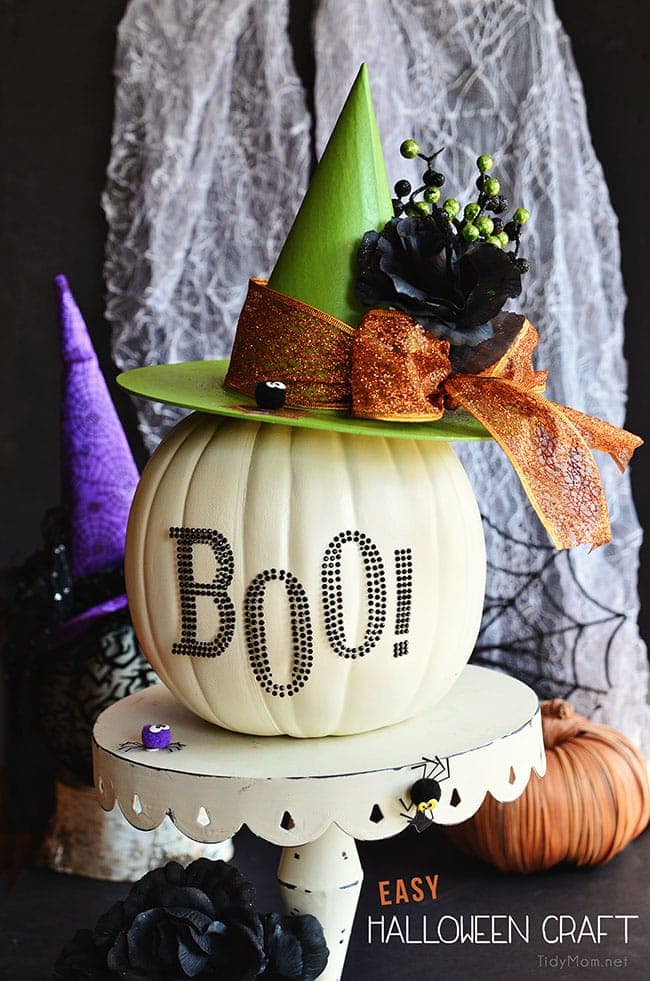
Easy Halloween Pumpkin Craft

Hi there, I'm Cheryl!
As a wife, mom, and caffeine enthusiast, my journey has taken me from bustling mornings with my family to sharing delicious recipes, home care tips, and heartfelt decorating insights with wonderful readers like you. My love for baking, photography, and tidiness shines through every post I craft. Dive into my world and discover the art of homemaking, one tidy moment at a time. Read more...
Tidymom is a participant in the amazon services llc associates program, an affiliate advertising program designed to provide a means for sites to earn advertising fees by advertising and linking to Amazon.com.
Please respect my work, recipes and photographs. If you do use a recipe in your own writing, please give proper credit and link back to the original post.
Haha! Great minds think alike. 😉 I absolutely love your planter. What a great idea.
xo Michael
Love this idea!
This is the cutest! I love it!
Very creative Cheryl! Perfect for fall! It was fun taking the 30 minute challenge with you!
This is the cutest thing ever! It’s inspiring me to not be so afraid of being crafty!
it’s beautiful! I just love it!!!!
Succulent planters never fail and yours is beautiful! Love the gold.
Cheryl,
Your pumpkin is ready for the HGTV garden channel! You go girl!
Have a great day rock star!
karianne
SO fantabulous!!! Love this idea and it looks perfect!
This is so darling, Cheryl! My mom brought me over a succulent pumpkin arrangement that she made last week! It’s beautiful! Succulents are so gorgeous… and I love them paired in a pumpkin as a fall harvest decoration!
Cheryl this is so beautiful!!! I totally want to make one! So fun being apart of this challenge with you. 🙂
This is such a cute idea! I have everything but the pumpkin…must head to the craft store tomorrow to get me one or two or…
Hello Cheryl! We had sent you a product review inquiry but did not receive any reply from you. So we have sent it again today since it might have gone to your spam box. We would greatly appreciate if you get back to us and tell us what you think about our offer. Thanks!
Amazing.. Pinning it!
This is such a cute idea! Where did you get your faux pumpkin? I was just looking online for some for the kids to carve and decorate.
Wow. Just wow. Love the succulents – love the pumpkins planter – Love!
If you’re interested in linking up, we are hosting Show Me Saturday and would love to help you spread the word about your pumpkins. Hoping you have an awesome weekend!
What a fabulous idea! I can’t believe I’ve never thought of this….I’ve done just about everything else with pumpkins 🙂
Very pretty!
love that idea!
b
I love the pumpkin used as a planter!! Sooo cute! I saw this featured on Blue Hued Nest (http://bluehuednest-design.blogspot.com) and had to come check it out!
I cannot wait to make this! I have tons of succulents leftover from my wedding so this will be perfect. Thank you for the great idea!
Such an easy way to decorate the front entry … love the square cut out, Cheryl. So pretty and fall-ish!
What an amazing idea! Love the pumpkins planter.
So creative and beautiful!